ZP-0085: Difference between revisions
Jump to navigation
Jump to search

m (Yoyojacky moved page 9-Layer Acrylic case for RPi 4B SKU: ZP-0085 to ZP-0085) |
|||
| (8 intermediate revisions by the same user not shown) | |||
| Line 1: | Line 1: | ||
==9-Layer Acrylic case for RPi 4B== | ==9-Layer Acrylic case for RPi 4B== | ||
[[File:Hhb.jpg|right|300px]] | |||
[[File:Hbg22.jpg|right|300px]] | |||
==Description== | ==Description== | ||
This is a 9-layer acrylic case featuring the colors of several national flags.<br> | This is a 9-layer acrylic case featuring the colors of several national flags.<br> | ||
| Line 7: | Line 10: | ||
==Features== | ==Features== | ||
* Easy to install | |||
* laser cutting | |||
* Acrylic material | |||
* 3007 Fan | |||
* Aluminum alloy heat sink pack | |||
* Different color to chose | |||
==Gallery== | ==Gallery== | ||
* German Style | |||
{| | |||
|[[File:Abc7.jpg|320px |left]] | |||
|[[File:Abc8.jpg|320px |none]] | |||
|[[File:Abc8.jpg|320px |none]] | |||
|} | |||
* French style | |||
{| | |||
|[[File:Abc19.jpg|320px |left]] | |||
|[[File:Abc20.jpg|320px |none]] | |||
|[[File:Abc21.jpg|320px |none]] | |||
|} | |||
* Spanish style | |||
{| | |||
|[[File:Abc13.jpg|320px |left]] | |||
|[[File:Abc14.jpg|320px |none]] | |||
|[[File:Abc15.jpg|320px |none]] | |||
|} | |||
* Italian style | |||
{| | |||
|[[File:Spannish1.jpg|320px |left]] | |||
|[[File:Spannish2.jpg|320px |none]] | |||
|[[File:Spannish3.jpg|320px |none]] | |||
|} | |||
* England style | |||
{| | |||
|[[File:Abc26.jpg|320px |left]] | |||
|[[File:Abc27.jpg|320px |none]] | |||
|[[File:Abc28.jpg|320px |none]] | |||
|} | |||
==Package Includes== | ==Package Includes== | ||
* 1 x 9-Layer acrylic case ( Random Color) | |||
* 1 x 3007 Fan with screws and nuts | |||
* 1 x Heat sink pack kit for RPi 4B | |||
* 1 x Screw driver | |||
==How to assemble== | ==How to assemble== | ||
* Step 1 Paste heat sinks to Raspberry Pi 4B after peeling off protect film. | |||
[[File:ZP-0085--PI4-9层亚克力-外壳--分5种颜色 1.jpg|left|500px]] | |||
<br style="clear:both;"> | |||
* Step 2 Peeling off the protect film from acrylic case. | |||
[[File:ZP-0085--PI4-9层亚克力-外壳--分5种颜色 2.jpg|left|500px]] | |||
<br style="clear:both;"> | |||
* Step 3 Put Raspberry Pi into the case. | |||
[[File:ZP-0085--PI4-9层亚克力-外壳--分5种颜色 3.jpg|left|500px]] | |||
<br style="clear:both;"> | |||
* Step 4 Put other 3 layers on top of the Raspberry Pi.e, last three layers will be as a holder. | |||
[[File:ZP-0085--PI4-9层亚克力-外壳--分5种颜色 3-2.jpg|left|500px]] | |||
<br style="clear:both;"> | |||
* Step 5 Fixed fan to the top layer and connect red wire to 5V and black wire to GND Pin on Raspberry Pi’s GPIO Pin. | |||
[[File:ZP-0085--PI4-9层亚克力-外壳--分5种颜色 4.jpg|left|500px]] | |||
<br style="clear:both;"> | |||
* Step 6 Fixed all acrylic layers with screws and nuts with screw driver. | |||
[[File:ZP-0085--PI4-9层亚克力-外壳--分5种颜色 5.jpg|left|500px]] | |||
<br style="clear:both;"> | |||
==Keywords== | |||
* 9-layer acrylic case, raspberry pi 4B, colorful case, acrylic case, fan, heat sinks | |||
==FAQ== | ==FAQ== | ||
* Q: Do you have russian style? | |||
A: No, just has five styles recently. | |||
Latest revision as of 19:41, 27 August 2021
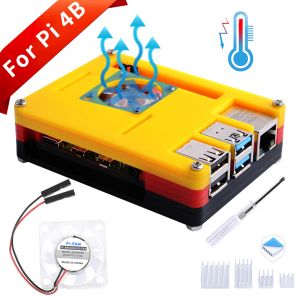
9-Layer Acrylic case for RPi 4B


Description
This is a 9-layer acrylic case featuring the colors of several national flags.
From the color match, you can guess which national flag colors they are.
It is very beautiful, with a small fan of 3007, providing a good The heat dissipation effect.
As always, is equipped with a screwdriver and a set of aluminum alloy heat sinks, which is very easy to install.
Features
- Easy to install
- laser cutting
- Acrylic material
- 3007 Fan
- Aluminum alloy heat sink pack
- Different color to chose
Gallery
- German Style
 |
 |
|
- French style
 |
 |
 |
- Spanish style
 |
 |
 |
- Italian style
 |
 |
 |
- England style
 |
 |
 |
Package Includes
- 1 x 9-Layer acrylic case ( Random Color)
- 1 x 3007 Fan with screws and nuts
- 1 x Heat sink pack kit for RPi 4B
- 1 x Screw driver
How to assemble
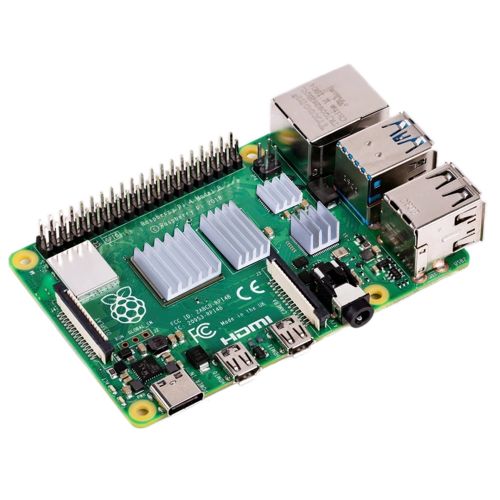
- Step 1 Paste heat sinks to Raspberry Pi 4B after peeling off protect film.

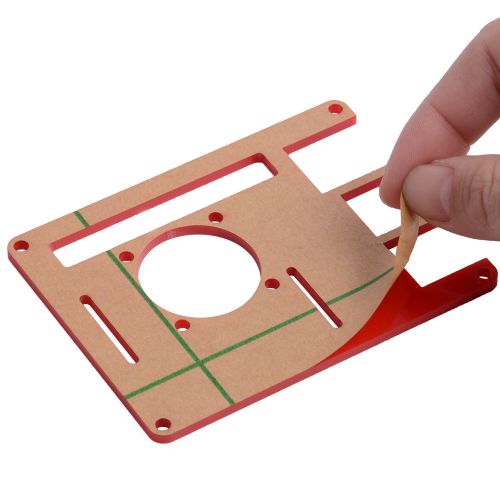
- Step 2 Peeling off the protect film from acrylic case.

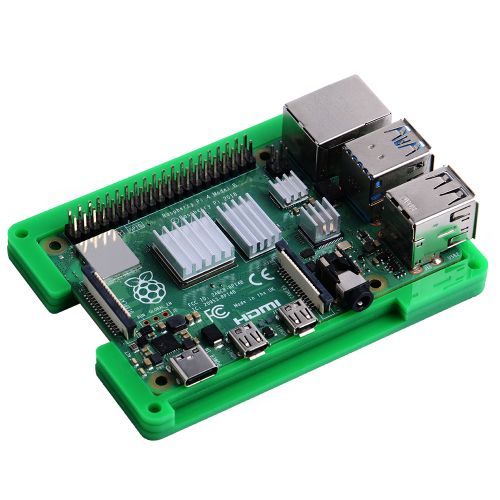
- Step 3 Put Raspberry Pi into the case.

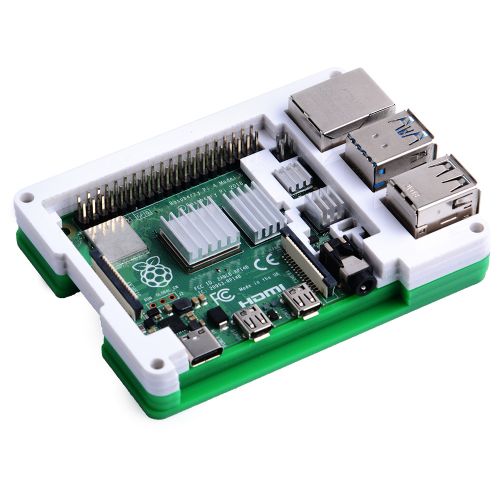
- Step 4 Put other 3 layers on top of the Raspberry Pi.e, last three layers will be as a holder.

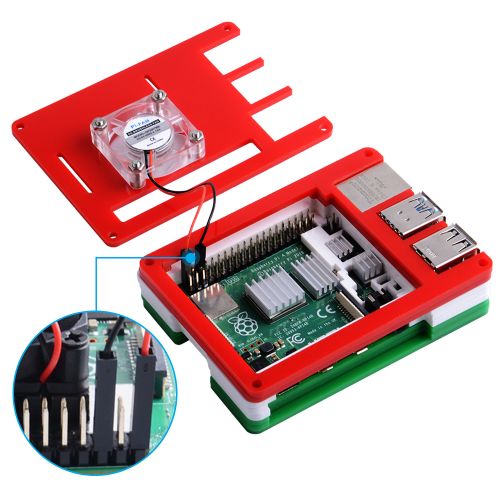
- Step 5 Fixed fan to the top layer and connect red wire to 5V and black wire to GND Pin on Raspberry Pi’s GPIO Pin.

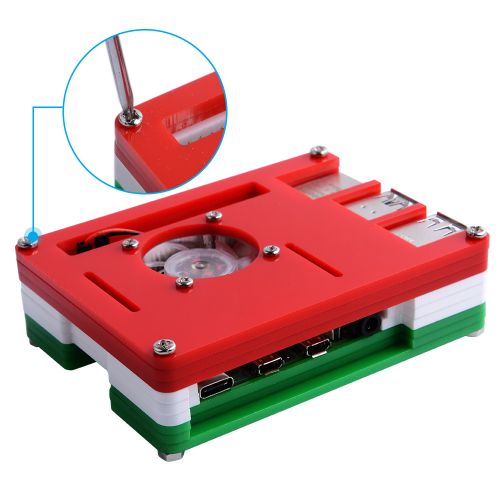
- Step 6 Fixed all acrylic layers with screws and nuts with screw driver.

Keywords
- 9-layer acrylic case, raspberry pi 4B, colorful case, acrylic case, fan, heat sinks
FAQ
- Q: Do you have russian style?
A: No, just has five styles recently.