EP-0084
7 inch Capacitive Touch Screen DIY Kit
* Purchase URL [ https://52pi.com/products/lcd-display-7-inch-1024-600-capacitive-touch-display-screen-monitor-for-raspberry-pi-4b-pc-beaglebone-black-free-driver-plug ]
Description
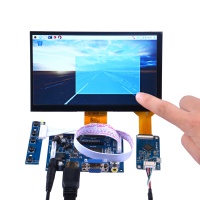
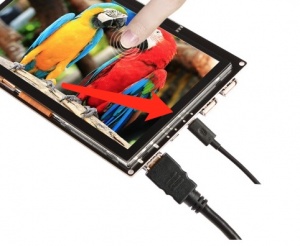
This is a new DIY kit for all makers; it is a fantastic HDMI monitor with capacitive touch screen and driver free.
It's based on 7 Inch 1024x600 Display Kit (without Touch Screen) SKU:Z-0051
We added a CTP driver board and provided a capacitive touch screen to make it a whole new suite.
After that, you don't need to calibrate your touch screen, and make your 7 inch display a touch screen.
It's been tested on Raspberry Pi, beagle bone black, PC and Mac book.
And it works well on those platforms and it is really plug and play.
It supports 1024x600 resolution and supports approximate 30fps, maximum 60fps
The capacitive touch function give the user full control over any device.
It's driver free for your device due to built-in EDID device information.
Tt is very easy to let the equipment correctly identified the touch screen.
The Capacitive USB touch screen can support functions of the right mouse button and drag and drop.
It can support multipoint touch, maximum 10 points. (Only test in windows 10)
Note: Touch Panel DO NOT SUPPORT KODI OS.
Compatibility List
- Compatibility
| Platform | Screen and driver board | Notes |
|---|---|---|
| Raspberry Pi 4 Model B | √ | |
| Raspberry Pi 3 Model A Plus | √ | |
| Raspberry Pi 3 Model B Plus | √ | |
| Raspberry Pi 3 Model B | √ | |
| Raspberry Pi 2 Model B | √ | |
| windows 7/8/10 | √ | |
| Mac | √ |
Feature
- Operating voltage: 5V (current requirement 2A), 9V@1.5A(Recommended), 12V@1A
- Rated power: 6-7W
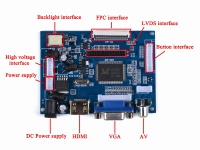
- Signal input: AV + VGA + HDMI (HDMI 1.2)
- Resolution: 1024 * 600
- Plug and Play, free driver.
- Brightness:250 cd/m² (Typ.)
- Contrast Ratio:500:1 (Typ.) (TM)
- View Angle: 70/70/50/70 (Typ.)(CR≥10)
- Respones Time: 10/15 (Typ.)(Tr/Td) ms
- OSD language: Simplified Chinese, Traditional Chinese, English, Japanese, Korean, Spanish, French, German, Italian, Portuguese
- Control: Multi-function OSD operation or potentiometer adjust the brightness and color
- Using mature program, clear display
- Multipoint touch, maximum 10 points. (Only test in windows 10)
- Support image flip up and down, the image can conversion 4: 3 / 16: 9 display format
- Support 30fps,maximum 60fps.
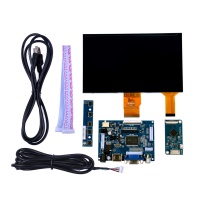
Package Includes
- 7 inch 1024x600 High Resolution Screen x 1
- 7 inch Capacitive Touch Panel x 1
- HDMI/VGA/S-Video Video driver board x1
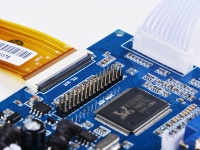
- CTP driver board (Capacitive Touch Panel Driver board) x 1
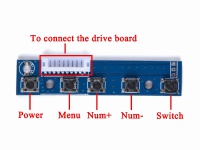
- Key board x1
- Key board cable wire x1
- Driver board Power supply cable wire x1
- USB touch screen cable wire x 1
Connection Details
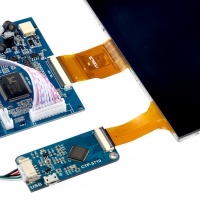
The CTP driver board has two USB port type, one of them is a MicroUSB cable on the right side.
(Both of them are available for your touch screen, one of them should be connected to the output device.)
Work with Raspberry Pi
If you are using Raspberry Pi, you can change resolution by these steps:
Login to your Raspberry Pi and edit /boot/config.txt file, make sure it has following parameter:
hdmi_force_hotplug=1
hdmi_group=2
hdmi_mode=87
hdmi_cvt 1024 600 60 3 0 0 0
Save it and reboot your system.
FAQ
If touch screen is out of work please make sure you connect the Display’s MicroUSB Port to your device (PC, Raspberry Pi, Beagle bone black etc.)
Note:
We are not sure it can work at android system due to it dose not test in android OS yet.
If you find that the screen is blur when you connect it to your device, please check the FPC cable on the back of driver board,
it may loose when it was shipping to you.
Just pull out the block of the FPC cable and put the FPC wires into it and make sure it fasten tightly and retry it again.
Please take care of this cabin cable; it’s connected to the board and sends the touch screen data to the chip on the board.
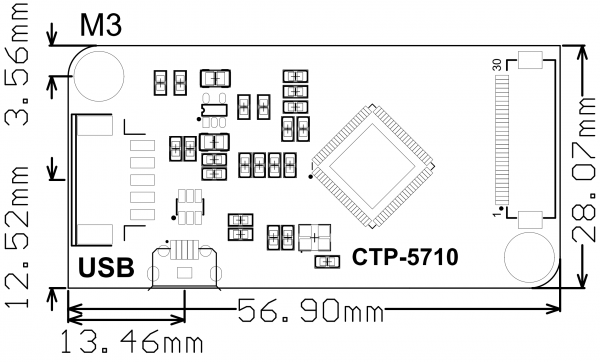
CTP Mechanical Drawing
Link below is the Capacitive Touch panel driver board's Mechanical Drawing:
Download:File:CTP-5710.pdf
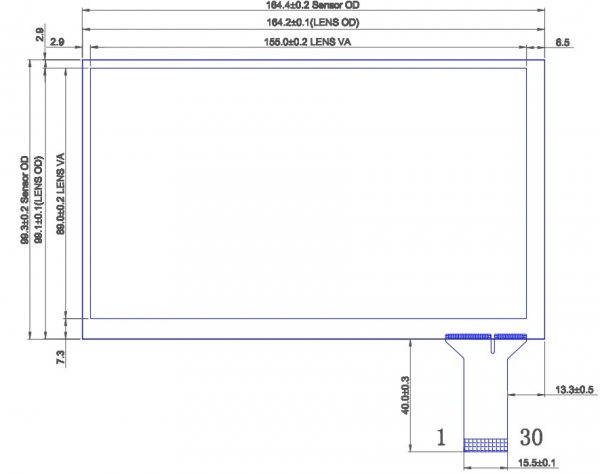
TP Mechanical Drawing
Link below is the Capacitive Touch panel's Mechanical Drawing:
Download:File:Tp-mechanical.pdf
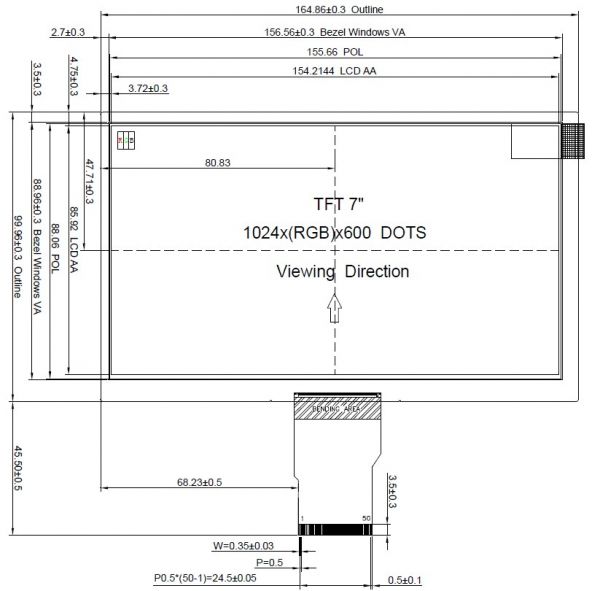
Screen Dimension
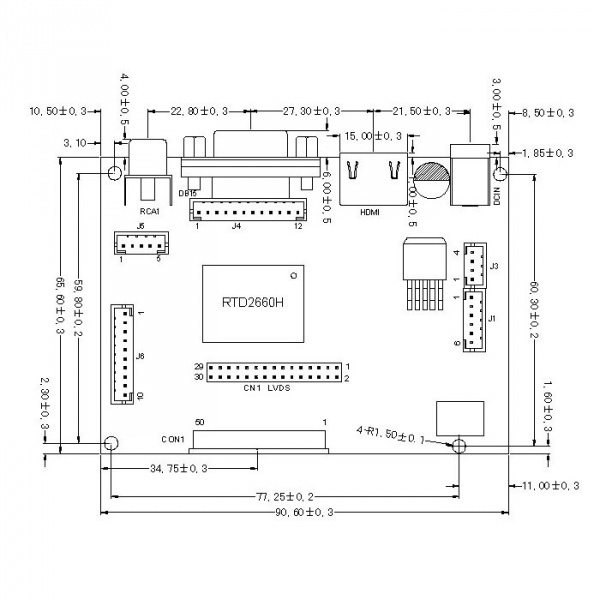
Video Driver Board Mechanical Drawing
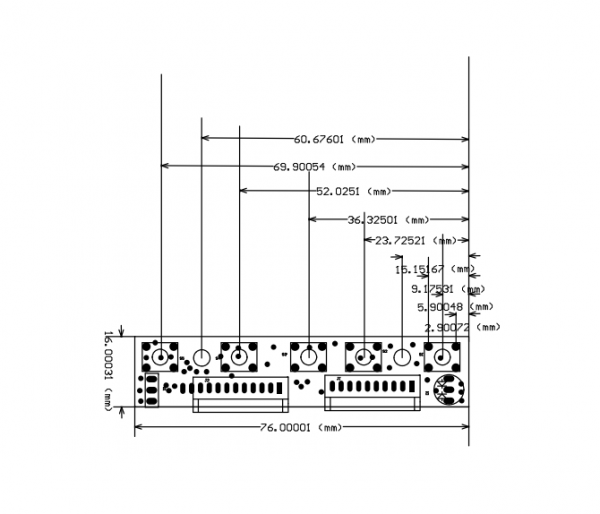
LCD Control Board Mechanical Drawing
How to invert rotate (clockwise or counterclockwise 180°) on touch screen
- 1. Make a folder named "/etc/X11/xorg.conf.d"
sudo mkdir -pv /etc/X11/xorg.conf.d
- 2. Create a configuration file named: "40-libinput.conf" in the folder that created before.
sudo vim.tiny /etc/X11/xorg.conf.d/40-libinput.conf
- 3. Paste this paragragh to your file
# Match on all types of devices but tablet devices and joysticks
Section "InputClass"
        Identifier "libinput pointer catchall"
        MatchIsPointer "on"
        MatchDevicePath "/dev/input/event*"
        Driver "libinput"
EndSection

Section "InputClass"
        Identifier "libinput keyboard catchall"
        MatchIsKeyboard "on"
        MatchDevicePath "/dev/input/event*"
        Driver "libinput"
EndSection

Section "InputClass"
        Identifier "libinput touchpad catchall"
        MatchIsTouchpad "on"
        MatchDevicePath "/dev/input/event*"
        Driver "libinput"
EndSection

Section "InputClass"
        Identifier "libinput touchscreen catchall"
        MatchIsTouchscreen "on"
        MatchDevicePath "/dev/input/event*"
        Driver "libinput"
#       please make sure you have this parameter.
        Option "CalibrationMatrix" "-1 0 1 0 -1 1 0 0 1
EndSection

Section "InputClass"
        Identifier "libinput tablet catchall"
        MatchIsTablet "on"
        MatchDevicePath "/dev/input/event*"
        Driver "libinput"
EndSection
- Please make sure you have this line in the Touch screen section:
Option "CalibrationMatrix" "-1 0 1 0 -1 1 0 0 1
And then save it and reboot your system.
FAQ
- Q: Why did i hookup everything but the touch panel is out of work?
- A: You need to plug the microUSB cable to the data microUSB port which is close to the standard USB port. it is far away from the HDMI cable.
- Q: How many colours has it got?
A: 16K
- To Configure Resolution:
If 7 inch screen is connected to Raspberry Pi, please configure resolution to 1024x600, otherwise it will not display properly. How to setup resolution please see the sections before.
- To Adjust Output:
If 7 inch screen is connected to computer but it does not display, please check the output settings of computer, and adjust the output souce to HDMI.
- No Driver Required:
The capacitive touch screen does not require additional driver due to the driver has been integrated on the board before it send out.
- About Touch Functions:
If the touch function does not work properly, or no respond, please try another MicroUSB cable which supports data transfer, you can also connect extra power cable.
- About FPC Connection:
If the screen can display but is not normal, please check if the FPC cable is not fitted tightly, then reconnect the screen to your device.
Testing Video
- 7 Inch Capacitive Touch Screen Testing Video
Please follow the link:
7 Inch Capacitive Touch Screen Testing Video
Video Tutorial
Please follow the link:
[ 7 inch Capacitive touch screen acrylic bracket assemble tutorial video | https://youtu.be/oWUhvf9gIhU ]
