K-0586: Difference between revisions
(Created page with "==Raspberry Pi Pico MicroPython Programing Sensor Kit== ==Description== This is the advanced version of Pico Kit produced by the GEEEKPI brand. It is designed for Raspberry Pi...") |
(→FAQ) |
||
| (27 intermediate revisions by the same user not shown) | |||
| Line 1: | Line 1: | ||
==Raspberry Pi Pico MicroPython Programing Sensor Kit== | ==Raspberry Pi Pico MicroPython Programing Sensor Kit== | ||
[[File:K-0586-3.jpg|right|320px]] | |||
* <font color=red>Purchase URL [ https://52pi.com/products/52pi-micropython-programing-sensor-kit-for-raspberry-pi-pico ]</font> | |||
==Description== | ==Description== | ||
This is the advanced version of Pico Kit produced by the GEEEKPI brand. It is designed for Raspberry Pi enthusiasts to learn Python programming and sensor applications, embedded learning, through a series of Sensor and display modules and Raspberry Pi Pico development boards . you can learn basic programming syntax and ideas via the demo code and experiments. | This is the advanced version of Pico Kit produced by the GEEEKPI brand. <br> | ||
The demo code provides many interesting applications. These modules will be used in some simple and easy-to-understand experimental projects and many complex and complicated applications and interesting project. Each experiment is equipped with graphic information and circuit connection methods. In addition to the demo code provided, each experiment also provides more space for learners to play. This is a very valuable learning tool! | It is designed for Raspberry Pi enthusiasts to learn Python programming and sensor applications, embedded learning, through a series of Sensor and display modules and Raspberry Pi Pico development boards . | ||
you can learn basic programming syntax and ideas via the demo code and experiments. | |||
The demo code provides many interesting applications. | |||
These modules will be used in some simple and easy-to-understand experimental projects and many complex and complicated applications and interesting project. Each experiment is equipped with graphic information and circuit connection methods. | |||
<br> | |||
In addition to the demo code provided, each experiment also provides more space for learners to play. This is a very valuable learning tool! | |||
==Features== | ==Features== | ||
* A variety of commonly used sensors | * A variety of commonly used sensors | ||
| Line 9: | Line 18: | ||
* Abundant learning resources | * Abundant learning resources | ||
* Easy to build circuit | * Easy to build circuit | ||
== | ==Compatibility List== | ||
* Compatibility | |||
{| class="wikitable" style="text-align: center;" | |||
{| class="wikitable" | |||
|- | |- | ||
! | !Platform !! Supported !! Notes | ||
|- | |- | ||
| Raspberry Pi Pico || √|| | |||
|- | |- | ||
| | |Raspberry Pi 4 Model B ||√ || | ||
|- | |- | ||
|3 || | |Raspberry Pi 3 Model B Plus||√ || | ||
|- | |- | ||
| | |Raspberry Pi 3 Model B ||√ || | ||
|- | |- | ||
| | |Raspberry Pi 2 Model B||√|| | ||
|- | |- | ||
| | |Raspberry Pi Model B+||√|| | ||
|- | |- | ||
| | |Raspberry Pi zero || √|| | ||
|- | |- | ||
| | | Raspberry Pi zero W || √|| | ||
|- | |- | ||
| | | Arduino Uno|| √|| | ||
|- | |- | ||
| | | Tinker Board || √|| | ||
|- | |- | ||
| | | Jetson Nano || √|| | ||
|- | |||
| ESP32 || √|| | |||
|- | |} | ||
| | ---- | ||
| | |||
==Gallery== | |||
* Specifications | |||
{| | |||
|[[File:K-0586-5.jpg|left|320px]] | |||
|[[File:K-0586-1.jpg|none|320px]] | |||
|[[File:K-0586-2.jpg|none|320px]] | |||
|} | |||
* Details | |||
{| | |||
|[[File:K-0586-4.jpg|left|320px]] | |||
|[[File:K-0586-7.jpg|none|320px]] | |||
| | |[[File:K-0586-8.jpg|none|320px]] | ||
| | |||
|- | |||
|- | |||
| | |||
| | |||
|- | |||
|- | |||
|- | |||
|} | |} | ||
* Application Scenario | |||
[[File:K-0586-6.jpg|left|500px]] | |||
<br style="clear:both;"> | |||
==Package Includes== | |||
[[File:K-05861.jpg|left|500px]] | |||
<br style="clear:both;"> | |||
==Documentations== | ==Documentations== | ||
* Raspberry Pi Pico Datasheet: [ https://datasheets.raspberrypi.org/pico/pico-datasheet.pdf ] | |||
* Raspberry Pi Pico Getting Start: [ https://datasheets.raspberrypi.org/pico/getting-started-with-pico.pdf ] | |||
* Raspberry Pi Pico MicroPython SDK: [ https://datasheets.raspberrypi.org/pico/raspberry-pi-pico-python-sdk.pdf ] | |||
* Raspberry Pi Pico MicroPython Firmware: [[ File:Rp2-pico-20210418-v1.15.uf2.zip ]] | |||
<pre>Note: Unzip it before drag it to Raspberry Pi Pico </pre> | |||
===Drag and drop MicroPython=== | |||
You can program your Pico by connecting it to a computer via USB, then dragging and dropping a file onto it, so we’ve put together a downloadable UF2 file to let you install MicroPython more easily. | |||
Download the MicroPython UF2 file by clicking the button below. | |||
Push and hold the BOOTSEL button and plug your Pico into the USB port of your Raspberry Pi or other computer. Release the BOOTSEL button after your Pico is connected. | |||
It will mount as a Mass Storage Device called RPI-RP2. | |||
Drag and drop the MicroPython UF2 file onto the RPI-RP2 volume. Your Pico will reboot. You are now running MicroPython. | |||
You can access the REPL via USB Serial. Our MicroPython documentation contains step-by-step instructions for connecting to your Pico and programming it in MicroPython. | |||
* Demo Code: [ https://github.com/geeekpi/picokitadv.git ] | |||
==Tutorial Video== | ==Tutorial Video== | ||
* YouTube: [ https://youtu.be/YVWAyn7TJFk ] | |||
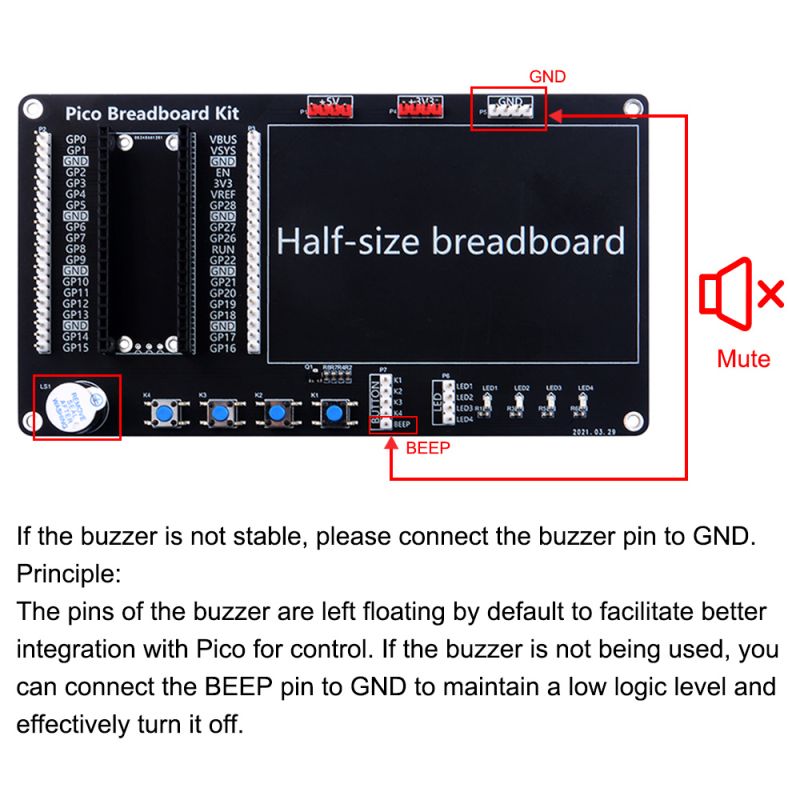
===How to mute the buzzer=== | |||
* The pins of the buzzer are left floating by default to facilitate better integration with Pico for control. If the buzzer is not being used, you can connect the BEEP pin to GND to maintain a low logic level and effectively turn it off. | |||
[[File:EP-0140-10.jpg|left|800px]] | |||
<br style="clear:both;"> | |||
==FAQ== | |||
* Q:I have successfully implemented Project 1 LED Blinking on my MicroPython Programming Starter Kit.But the high-pitched buzzer is sounding while the LEDs are blinking.I can stop the buzzer by shorting out its soldered connections but this stops the LEDs from blinking. | |||
How can I run my projects without the buzzer sounding? | |||
A: Please connect the buzzer pin to GND Pin onboard or just connect it to a Pin which you can put the pin in low level, for example, you can just connect the buzzer pin to GP1 and then in your code, adding following code: | |||
<pre> | |||
from machine import Pin | |||
buzzer = Pin(1, Pin.OUT) | |||
buzzer.value(0) | |||
</pre> | |||
it will stop the buzzer from sounding and you can control it whenever you want to let it buzzering by just put the buzzer.value(1). | |||
==Keywords== | ==Keywords== | ||
* Raspberry Pi Pico MicroPython Programing Sensor Kit, micropython, raspberry pi pico, starter kit, programing kit | * Raspberry Pi Pico MicroPython Programing Sensor Kit, micropython, raspberry pi pico, starter kit, programing kit | ||
Latest revision as of 11:51, 12 December 2023
Raspberry Pi Pico MicroPython Programing Sensor Kit
- Purchase URL [ https://52pi.com/products/52pi-micropython-programing-sensor-kit-for-raspberry-pi-pico ]
Description
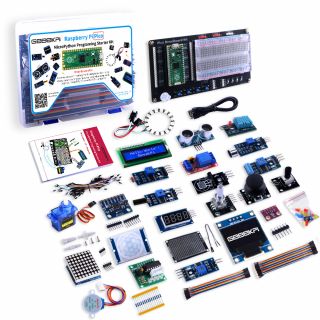
This is the advanced version of Pico Kit produced by the GEEEKPI brand.
It is designed for Raspberry Pi enthusiasts to learn Python programming and sensor applications, embedded learning, through a series of Sensor and display modules and Raspberry Pi Pico development boards .
you can learn basic programming syntax and ideas via the demo code and experiments.
The demo code provides many  interesting applications.
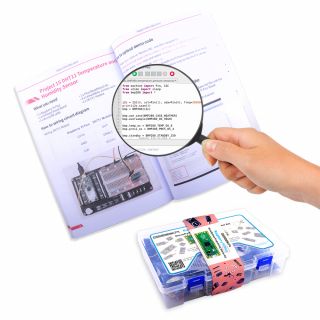
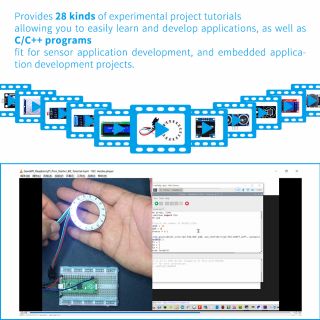
These modules will be used in some simple and easy-to-understand experimental projects and many complex and complicated applications and interesting project. Each experiment is equipped with graphic information and circuit connection methods.
In addition to the demo code provided, each experiment also provides more space for learners to play. This is a very valuable learning tool!
Features
- A variety of commonly used sensors
- Including experimental platform
- One-stop shopping
- Abundant learning resources
- Easy to build circuit
Compatibility List
- Compatibility
| Platform | Supported | Notes |
|---|---|---|
| Raspberry Pi Pico | √ | |
| Raspberry Pi 4 Model B | √ | |
| Raspberry Pi 3 Model B Plus | √ | |
| Raspberry Pi 3 Model B | √ | |
| Raspberry Pi 2 Model B | √ | |
| Raspberry Pi Model B+ | √ | |
| Raspberry Pi zero | √ | |
| Raspberry Pi zero W | √ | |
| Arduino Uno | √ | |
| Tinker Board | √ | |
| Jetson Nano | √ | |
| ESP32 | √ |
Gallery
- Specifications
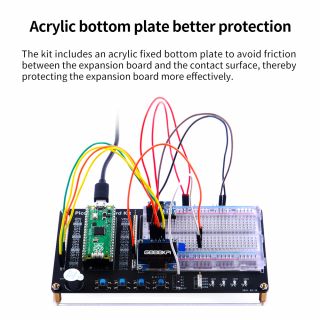
- Details
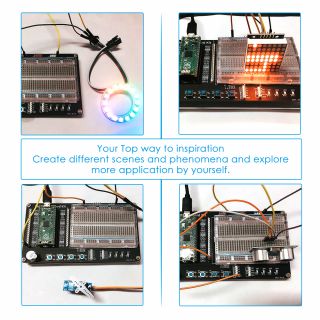
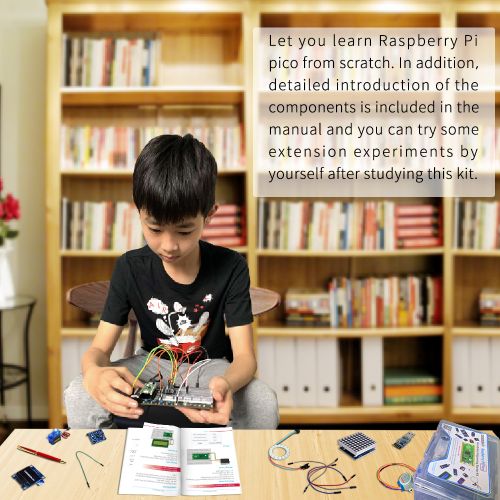
- Application Scenario
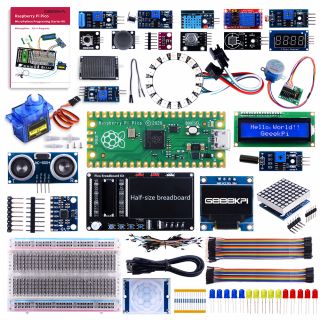
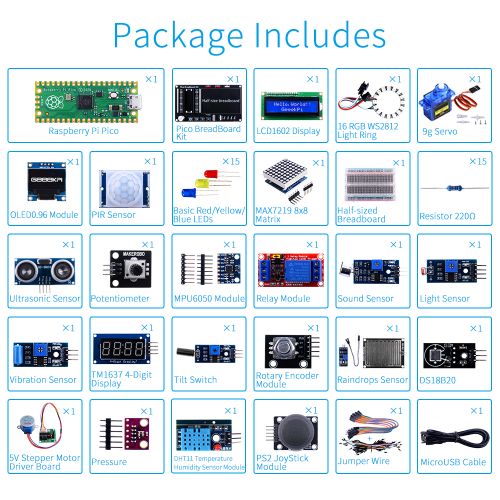
Package Includes
Documentations
- Raspberry Pi Pico Datasheet: [ https://datasheets.raspberrypi.org/pico/pico-datasheet.pdf ]
- Raspberry Pi Pico Getting Start: [ https://datasheets.raspberrypi.org/pico/getting-started-with-pico.pdf ]
- Raspberry Pi Pico MicroPython SDK: [ https://datasheets.raspberrypi.org/pico/raspberry-pi-pico-python-sdk.pdf ]
- Raspberry Pi Pico MicroPython Firmware: File:Rp2-pico-20210418-v1.15.uf2.zip
Note: Unzip it before drag it to Raspberry Pi Pico
Drag and drop MicroPython
You can program your Pico by connecting it to a computer via USB, then dragging and dropping a file onto it, so we’ve put together a downloadable UF2 file to let you install MicroPython more easily.
Download the MicroPython UF2 file by clicking the button below. Push and hold the BOOTSEL button and plug your Pico into the USB port of your Raspberry Pi or other computer. Release the BOOTSEL button after your Pico is connected. It will mount as a Mass Storage Device called RPI-RP2. Drag and drop the MicroPython UF2 file onto the RPI-RP2 volume. Your Pico will reboot. You are now running MicroPython. You can access the REPL via USB Serial. Our MicroPython documentation contains step-by-step instructions for connecting to your Pico and programming it in MicroPython.
- Demo Code: [ https://github.com/geeekpi/picokitadv.git ]
Tutorial Video
- YouTube: [ https://youtu.be/YVWAyn7TJFk ]
How to mute the buzzer
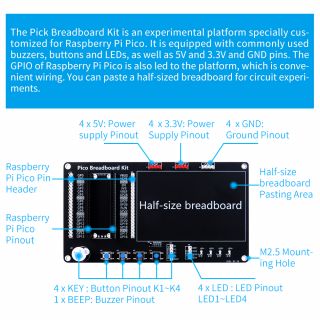
- The pins of the buzzer are left floating by default to facilitate better integration with Pico for control. If the buzzer is not being used, you can connect the BEEP pin to GND to maintain a low logic level and effectively turn it off.
FAQ
- Q:I have successfully implemented Project 1 LED Blinking on my MicroPython Programming Starter Kit.But the high-pitched buzzer is sounding while the LEDs are blinking.I can stop the buzzer by shorting out its soldered connections but this stops the LEDs from blinking.
How can I run my projects without the buzzer sounding?
A: Please connect the buzzer pin to GND Pin onboard or just connect it to a Pin which you can put the pin in low level, for example, you can just connect the buzzer pin to GP1 and then in your code, adding following code:
from machine import Pin
buzzer = Pin(1, Pin.OUT)
buzzer.value(0)
it will stop the buzzer from sounding and you can control it whenever you want to let it buzzering by just put the buzzer.value(1).
Keywords
- Raspberry Pi Pico MicroPython Programing Sensor Kit, micropython, raspberry pi pico, starter kit, programing kit
