EP-0219: Difference between revisions
Jump to navigation
Jump to search

(Created page with "==P02 PCIe Slot for RPI5== right|320px ==Description== The P02 PCIe Slot for RPI5 (hereinafter referred to as P02) is a Raspberry Pi Hat designed to convert the Raspberry Pi's PCIe into a PCIe x1 slot. This innovative accessory broadens the Raspberry Pi's capabilities by enabling the connection of PCIe devices, providing users with a versatile solution for expanding their Raspberry Pi projects. The P02 Hat is an essential tool for anyone seeking to max...") |
No edit summary |
||
| (21 intermediate revisions by the same user not shown) | |||
| Line 1: | Line 1: | ||
==P02 PCIe Slot for RPI5== | ==P02 PCIe Slot for RPI5== | ||
[[File: | [[File:EP-0219-1.jpg|right|320px]] | ||
==Description== | ==Description== | ||
The P02 PCIe Slot for RPI5 (hereinafter referred to as P02) is a Raspberry Pi | The P02 PCIe Slot for RPI5 (hereinafter referred to as P02) is a Raspberry Pi baseboard designed to convert the Raspberry Pi's PCIe into a PCIe x1 slot. This innovative accessory broadens the Raspberry Pi's capabilities by enabling the connection of PCIe devices, providing users with a versatile solution for expanding their Raspberry Pi projects. The P02 baseboard is an essential tool for anyone seeking to maximize the potential of their Raspberry Pi. | ||
==Features== | ==Features== | ||
* <strong> Compatibility</strong>Focused on the latest single-board computer, the Raspberry Pi 5. | * <strong> Compatibility</strong>Focused on the latest single-board computer, the Raspberry Pi 5. | ||
* <strong> Open Slot Design:</strong> Structurally compatible with x1, x2, x4, x8, x16 using an open slot design. | * <strong> Open Slot Design:</strong> Structurally compatible with x1, x2, x4, x8, x16 using an open slot design. | ||
* <strong> PCIe x1 Supports:</strong> Supports PCIe x1 interface in both Gen2 and Gen3 standards. | * <strong> PCIe x1 Supports:</strong> Supports PCIe x1 interface in both Gen2 and Gen3 standards. | ||
* <strong>Power Supply</ | * <strong> Power Supply: </strong> Incorporates a built-in 12V power supply design, capable of providing up to 1A current to meet most PCIe adapter card needs. Additionally, reserves an external 12V power supply structure for high-power PCIe cards. | ||
* <strong>Gold-plated PCB: </strong> Offers superior electrical performance. | * <strong> Gold-plated PCB: </strong> Offers superior electrical performance. | ||
* <strong> PCIe ultra-short signal lines:</strong> Utilizes short trace routing for PCIe, ensuring reliability and speed, fully meeting the signal requirements of PCIe 3.0. | * <strong> PCIe ultra-short signal lines:</strong> Utilizes short trace routing for PCIe, ensuring reliability and speed, fully meeting the signal requirements of PCIe 3.0. | ||
===Specifications=== | ===Specifications=== | ||
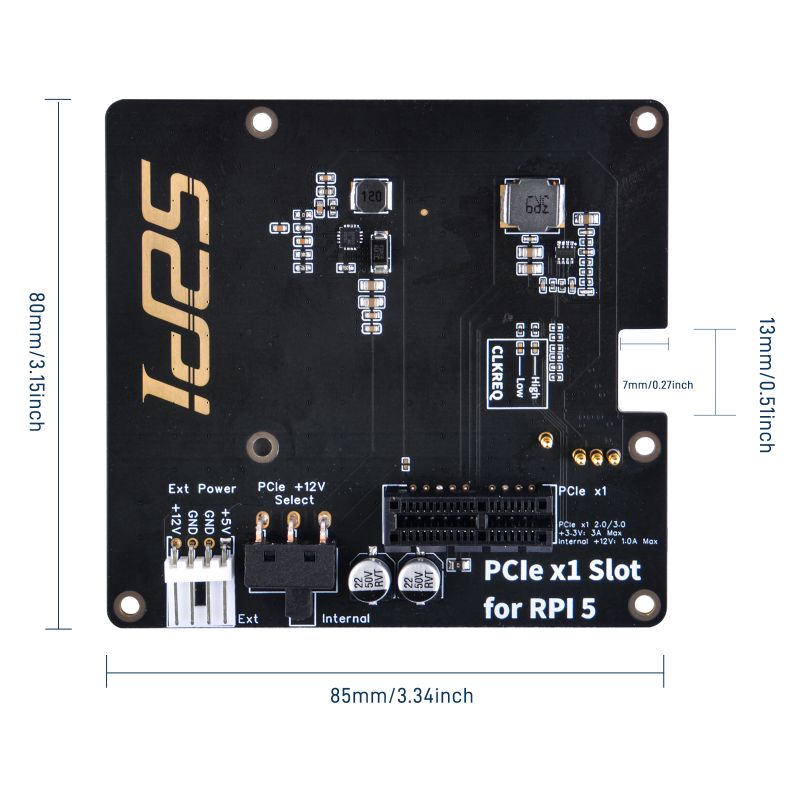
* Size: 85x80mm | * Size: 85x80mm | ||
* Builtin power for PCIe x1 slot: +12V/1A, +3.3V/3A | * Builtin power for PCIe x1 slot: +12V/1A, +3.3V/3A | ||
==Gallery== | ==Gallery== | ||
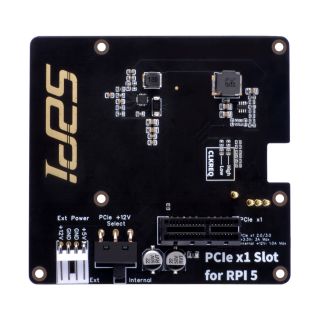
* Product outlook | * Product outlook | ||
[[File: | [[File:EP-0219-1.jpg|left|800px]] | ||
<br style="clear:both;"> | <br style="clear:both;"> | ||
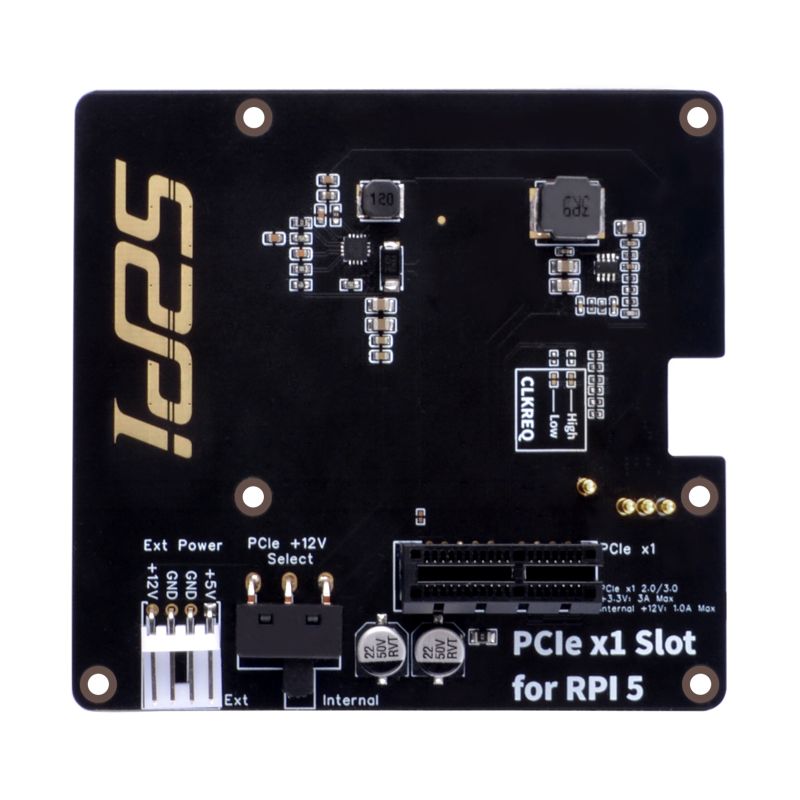
* Frontal face | * Frontal face | ||
[File: | [[File:EP-0219-3.jpg|left|800px]] | ||
<br style="clear:both;"> | <br style="clear:both;"> | ||
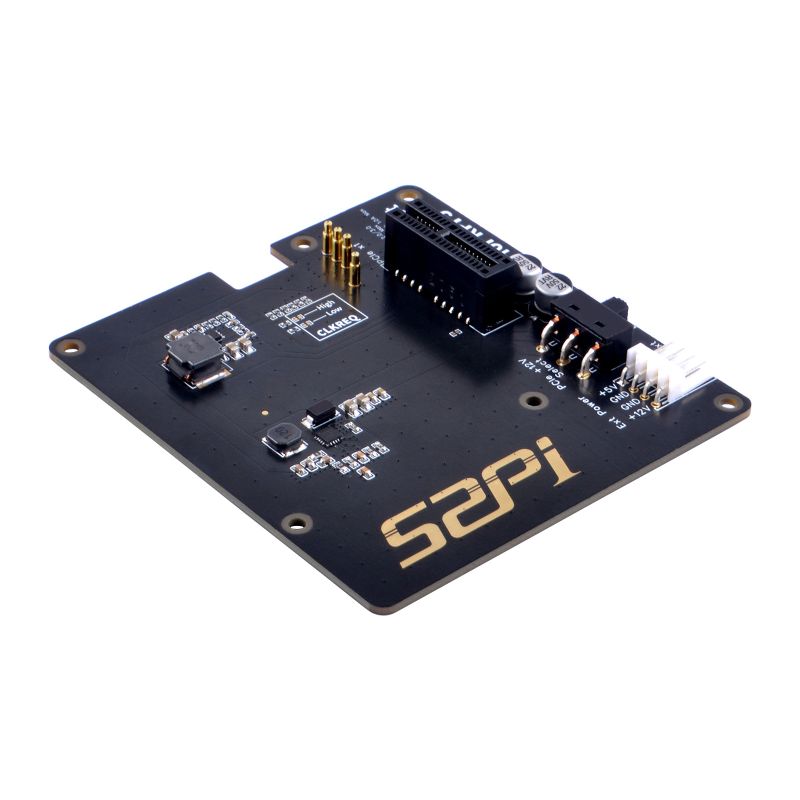
* back face | * back face | ||
[File: | [[File:EP-0219-2.jpg|left|800px]] | ||
<br style="clear:both;"> | |||
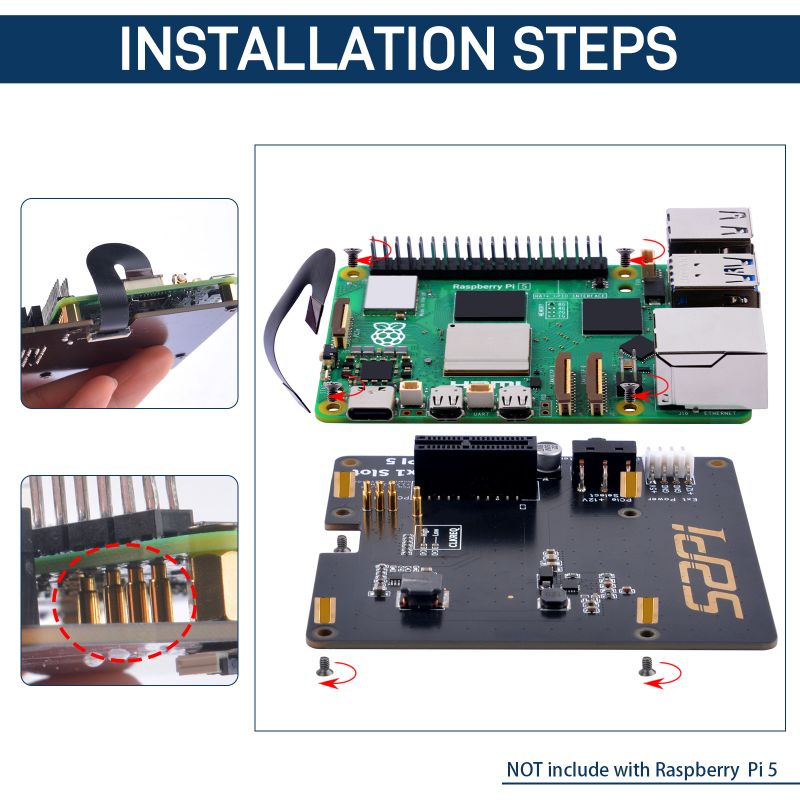
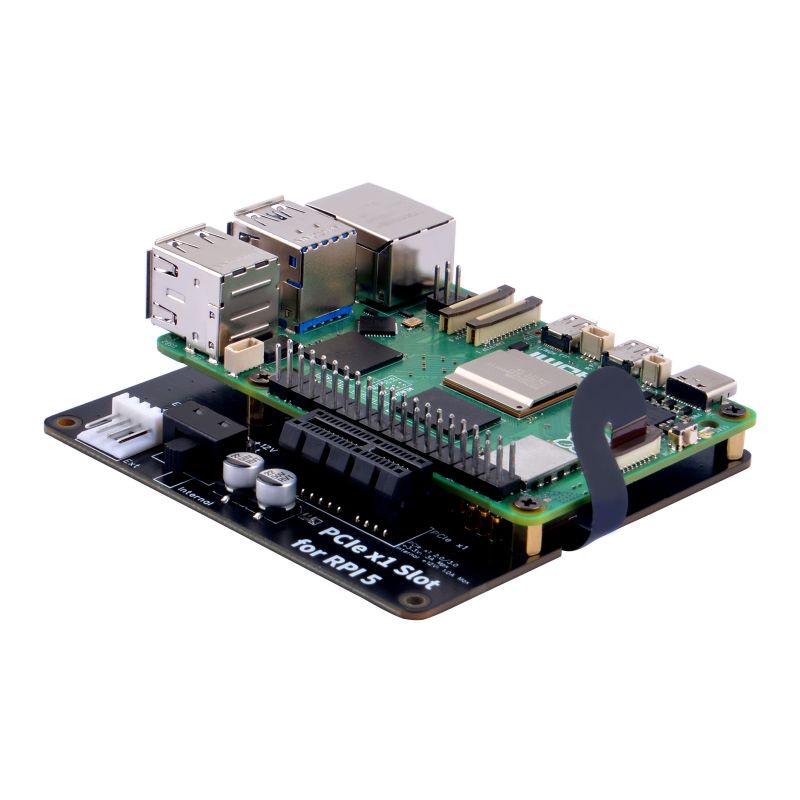
===How to assemble it? === | |||
* Please assemble it as following figures. | |||
[[File:EP-0219-7.jpg|left|800px]] | |||
<br style="clear:both;"> | |||
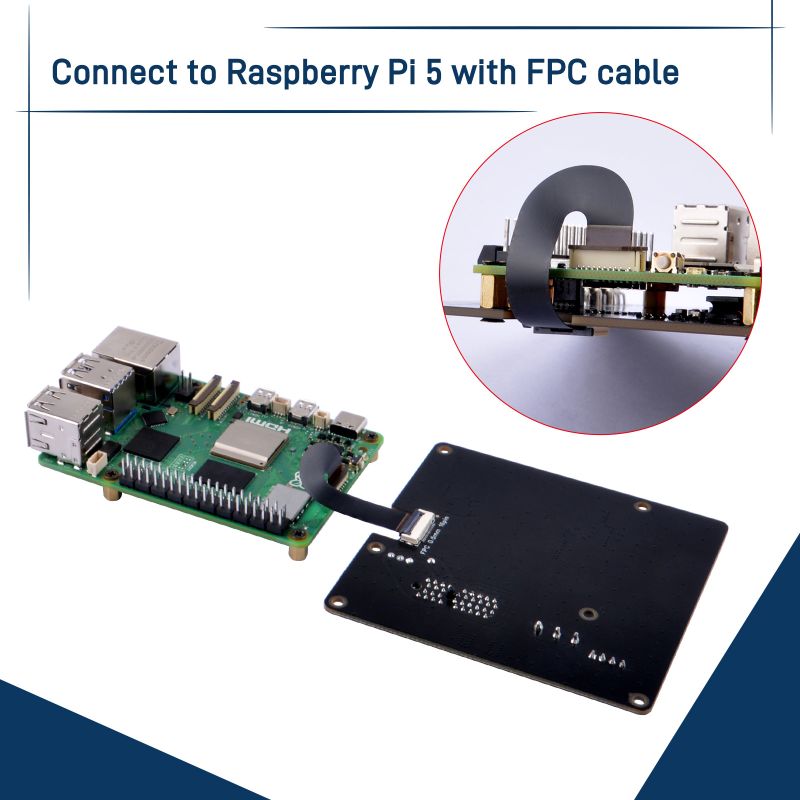
* How to connect the FPC cable | |||
[[File:EP-0219-8.jpg|left|800px]] | |||
<br style="clear:both;"> | |||
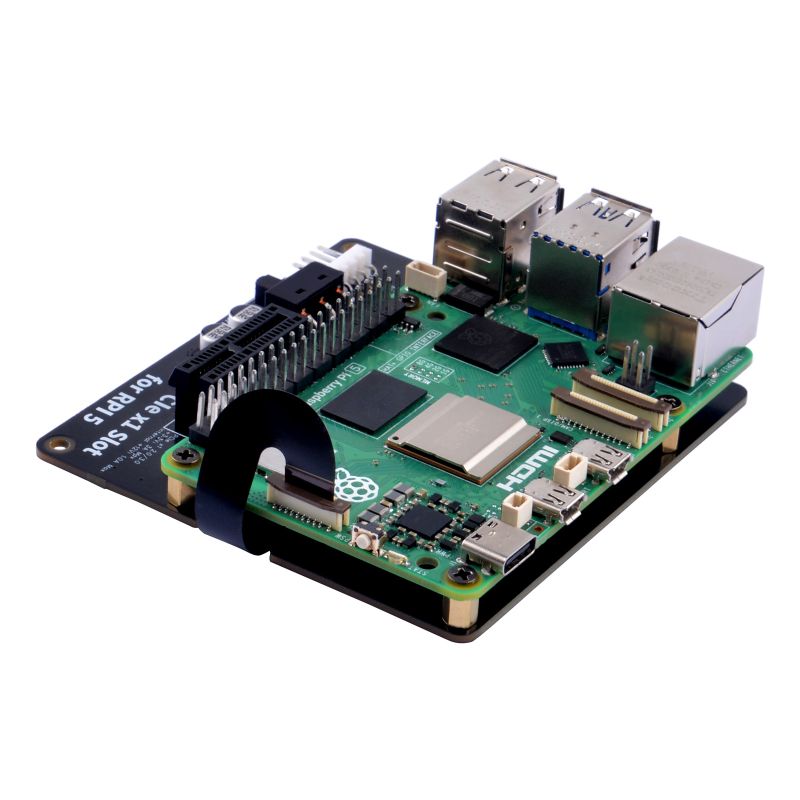
[[File:EP-0219-4.jpg|left|800px]] | |||
<br style="clear:both;"> | |||
[[File:EP-0219-5.jpg|left|800px]] | |||
<br style="clear:both;"> | |||
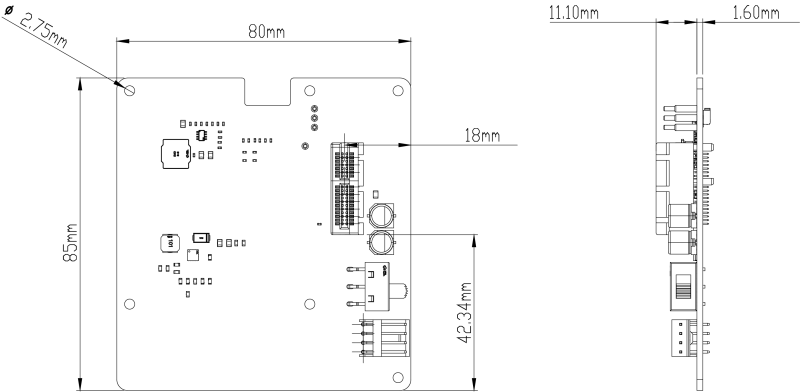
* Dimension | |||
[[File:EP-0219-9.jpg|left|800px]] | |||
<br style="clear:both;"> | |||
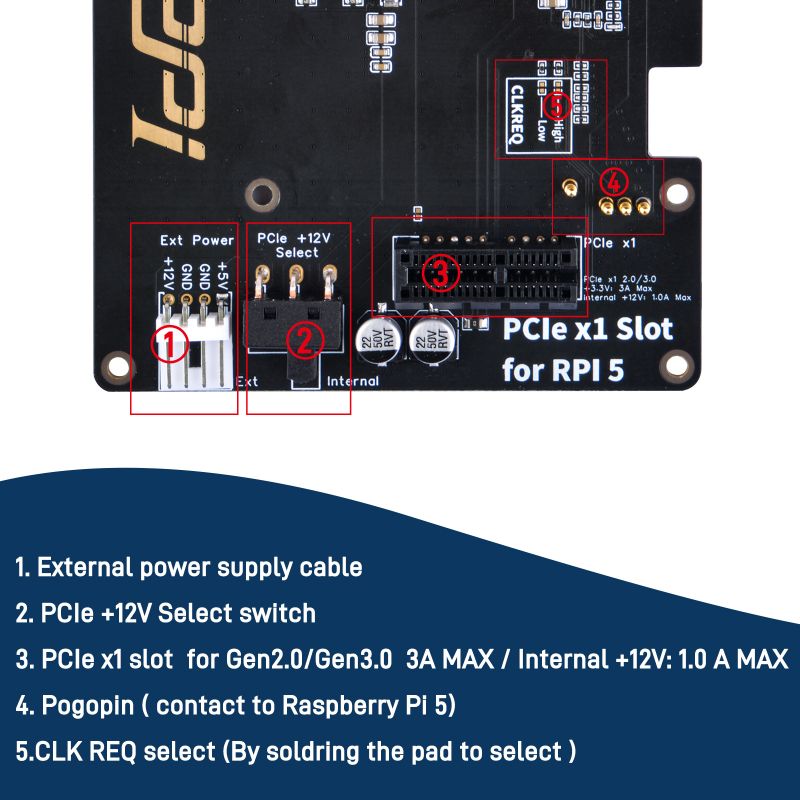
* Port Definitions | |||
[[File:EP-0219-10.jpg|left|800px]] | |||
<br style="clear:both;"> | |||
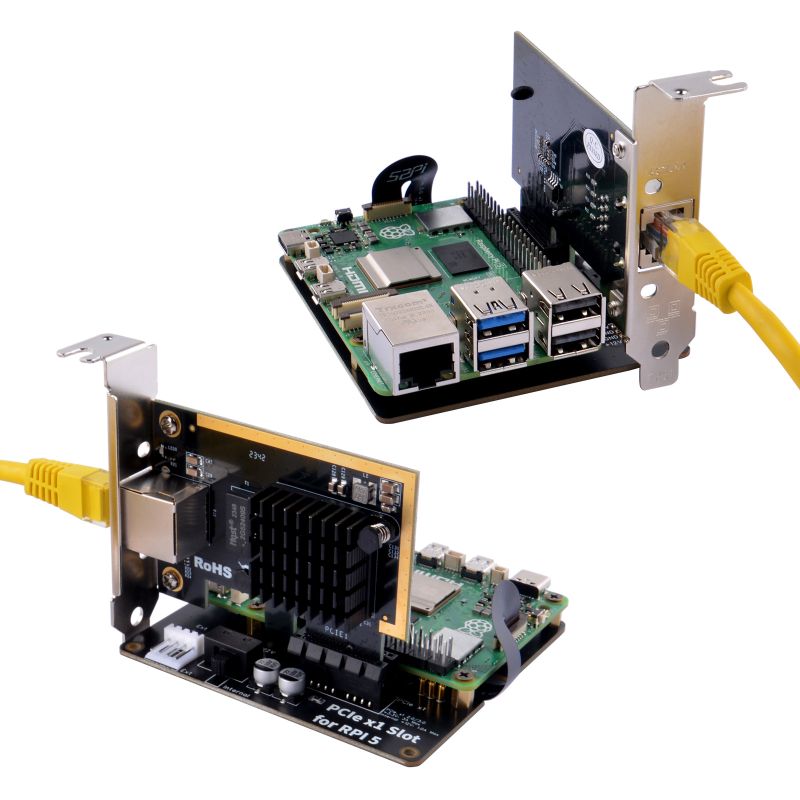
* Application scenario | |||
Connect to PCIe NIC (network interface card, additional purchase required!!) | |||
[[File:EP-0219-06.jpg|left|800px]] | |||
<br style="clear:both;"> | <br style="clear:both;"> | ||
==How to | ==How to enable PCIe x1 on Raspberry Pi 5 == | ||
* 1. Open a terminal and use nano to edit the config.txt file. This file is used to alter the configuration of the Raspberry Pi. With it we can overclock the CPU and GPU and in this case set the PCIe connection speed. | |||
<pre> | |||
sudo nano /boot/config.txt | |||
</pre> | |||
* 2. Using the cursor keys, move down to the bottom of the file and add a section for NVMe configuration. We use a comment to denote what this block will do. | |||
<pre> | |||
#NVMe Configuration | |||
# Enable the PCIe External connector. | |||
dtparam=pciex1 | |||
</pre> | |||
* 3. Set the PCIe connection speed. There is official support for PCIe Gen 2 speeds, but we’ve tested Gen 3 and it works perfectly. Your mileage may vary, so if it doesn’t work, change this to 2. | |||
<pre> | |||
dtparam=pciex1_gen=3 | |||
</pre> | |||
Setting up an NVMe SSD on the Raspberry Pi 5 | |||
* 4. Press CTRL + X. Then press Y and Enter to save and exit the editor. | |||
* 5. Reboot the Raspberry Pi for the change to take effect. | |||
==Mechanical Drawings== | ==Mechanical Drawings== | ||
[[ File:2D Mech RPI5 PCIe-Slot x1 2024-01-16.png|left|800px]] | [[ File:2D Mech RPI5 PCIe-Slot x1 2024-01-16.png|left|800px]] | ||
<br style="clear:both;"> | <br style="clear:both;"> | ||
* 2D Mechanical Drawig file Download: [ File:2D Mech RPI5 PCIe-Slot x1 2024-01-16.pdf ] | * 2D Mechanical Drawig file Download: [[ File:2D Mech RPI5 PCIe-Slot x1 2024-01-16.pdf ]] | ||
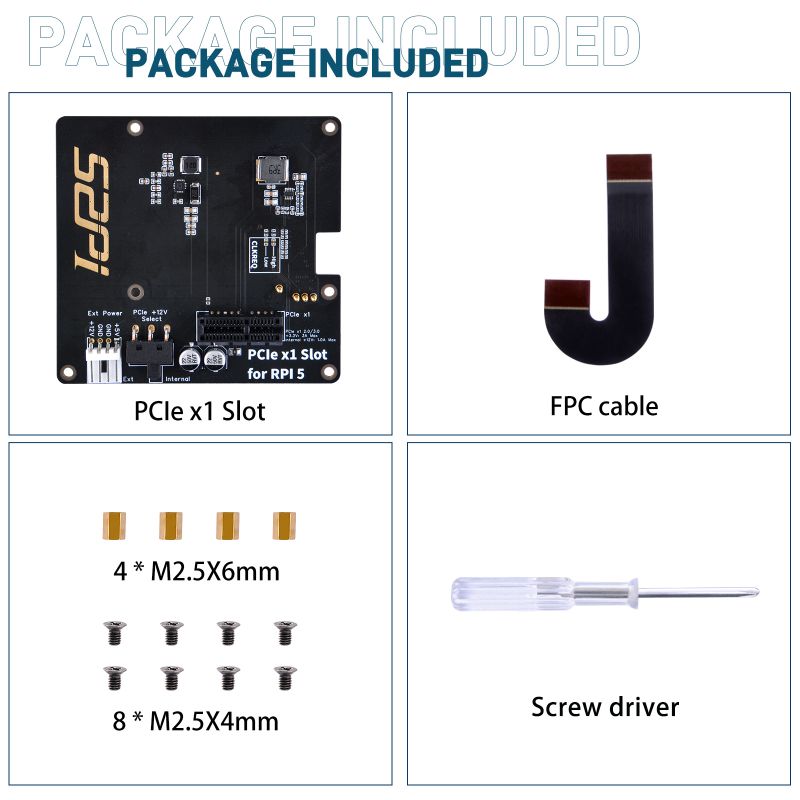
==Package Includes== | ==Package Includes== | ||
* 1 x P02 PCIe Slot for RPI5 | * 1 x P02 PCIe Slot for RPI5 | ||
* 1 x Custom PCIe FFC cable | * 1 x Custom PCIe FFC cable | ||
* 4 x | * 4 x M2.5 x 6mm Coppler pillar | ||
* | * 8 x M2.5 x 4mm Flat head screw | ||
* | * 1 x Screw driver (M2.5) | ||
* | [[File:EP-0219-6.jpg|left|800px]] | ||
<br style="clear:both;"> | |||
==Keywords== | |||
* PCIe extension board for Raspberry Pi 5, PCIe x1 extension board, PCIe Slot for RPi 5. | |||
Latest revision as of 17:11, 22 February 2024
P02 PCIe Slot for RPI5

Description
The P02 PCIe Slot for RPI5 (hereinafter referred to as P02) is a Raspberry Pi baseboard designed to convert the Raspberry Pi's PCIe into a PCIe x1 slot. This innovative accessory broadens the Raspberry Pi's capabilities by enabling the connection of PCIe devices, providing users with a versatile solution for expanding their Raspberry Pi projects. The P02 baseboard is an essential tool for anyone seeking to maximize the potential of their Raspberry Pi.
Features
- CompatibilityFocused on the latest single-board computer, the Raspberry Pi 5.
- Open Slot Design: Structurally compatible with x1, x2, x4, x8, x16 using an open slot design.
- PCIe x1 Supports: Supports PCIe x1 interface in both Gen2 and Gen3 standards.
- Power Supply: Incorporates a built-in 12V power supply design, capable of providing up to 1A current to meet most PCIe adapter card needs. Additionally, reserves an external 12V power supply structure for high-power PCIe cards.
- Gold-plated PCB: Offers superior electrical performance.
- PCIe ultra-short signal lines: Utilizes short trace routing for PCIe, ensuring reliability and speed, fully meeting the signal requirements of PCIe 3.0.
Specifications
- Size: 85x80mm
- Builtin power for PCIe x1 slot: +12V/1A, +3.3V/3A
Gallery
- Product outlook
- Frontal face

- back face

How to assemble it?
- Please assemble it as following figures.

- How to connect the FPC cable


- Dimension

- Port Definitions

- Application scenario
Connect to PCIe NIC (network interface card, additional purchase required!!)

How to enable PCIe x1 on Raspberry Pi 5
- 1. Open a terminal and use nano to edit the config.txt file. This file is used to alter the configuration of the Raspberry Pi. With it we can overclock the CPU and GPU and in this case set the PCIe connection speed.
sudo nano /boot/config.txt
- 2. Using the cursor keys, move down to the bottom of the file and add a section for NVMe configuration. We use a comment to denote what this block will do.
#NVMe Configuration
# Enable the PCIe External connector.
dtparam=pciex1
- 3. Set the PCIe connection speed. There is official support for PCIe Gen 2 speeds, but we’ve tested Gen 3 and it works perfectly. Your mileage may vary, so if it doesn’t work, change this to 2.
dtparam=pciex1_gen=3
Setting up an NVMe SSD on the Raspberry Pi 5
- 4. Press CTRL + X. Then press Y and Enter to save and exit the editor.
- 5. Reboot the Raspberry Pi for the change to take effect.
Mechanical Drawings

- 2D Mechanical Drawig file Download: File:2D Mech RPI5 PCIe-Slot x1 2024-01-16.pdf
Package Includes
- 1 x P02 PCIe Slot for RPI5
- 1 x Custom PCIe FFC cable
- 4 x M2.5 x 6mm Coppler pillar
- 8 x M2.5 x 4mm Flat head screw
- 1 x Screw driver (M2.5)

Keywords
- PCIe extension board for Raspberry Pi 5, PCIe x1 extension board, PCIe Slot for RPi 5.