Z-0235
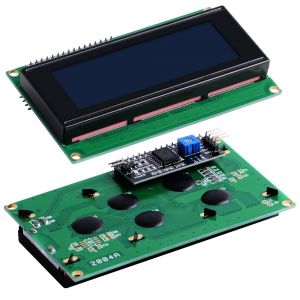
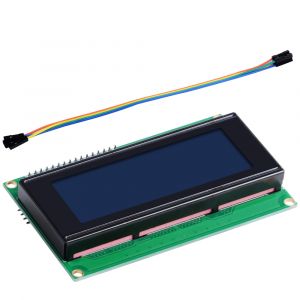
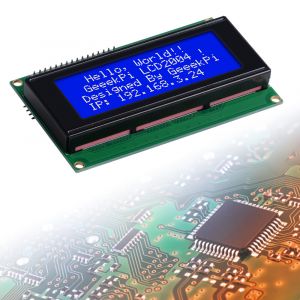
2004 Serial LCD Module Display
- Purchase URL [ https://52pi.com/products/52pi-2004-serial-lcd-module-display ]
Description
The LCD has always been a device that acts as a window in human-computer interaction.
For example, the prompt window on some instrument devices, the temperature and humidity prompt box,
the device running status monitor, and the prompt screen of the counting device all have LCD figures.
The common LCD1602, LCD2004, and LCD12864 are fabricated using liquid crystal materials and communicated using the I2C bus.
It is a high-performance serial bus with bus rules and high-speed or low-speed device synchronization required for multi-master systems.
The I2C bus has only two bidirectional signal lines, a serial data line (SDA) and a serial clock line (SCL).
Compatible with all devices with I2C interfaces, such as Arduino, raspberry pi, beagle bone black, tinker board, stm32, esp32 and more.
Features
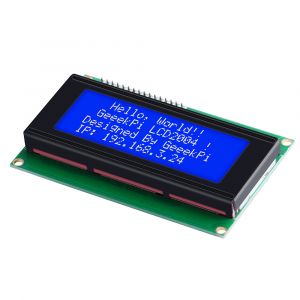
- 20 Characters * 4 Lines, Character LCD module
- 5V for Logic Circuit
- Low power consumption
- Support I2C protocol
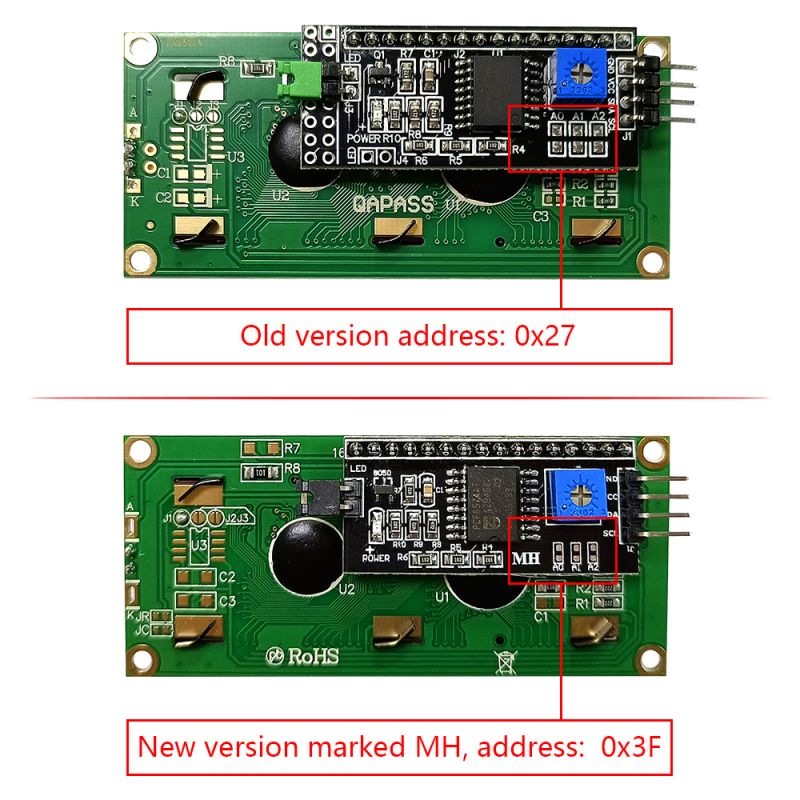
- Default Register Address: New version: 0x3F, old version: 0x27
- Easy to use
- Compatible with Raspberry Pi, banana Pi, Tinker Board, STM32, ESP32 etc.
- Type: Chip On Board
- Number of Data line: 8-bit parallel
- Backlight Color: Yellow
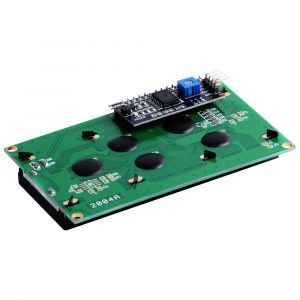
After May. 27th 2022, the LCD2004 display screen and LCD1602 display screen of our products have been upgraded, and the register address of the new version is updated to 0x3F. The register address of the old version is 0x27, identification method: The new version contains "MH" in the silk screen of the rear adapter board and The distance between the potentiometer and the pad below is larger, and the old version is the opposite.
Gallery
Package Include
- 1 x LCD2004
- 4 x Jumpwire
How to assemble it to Raspberry Pi
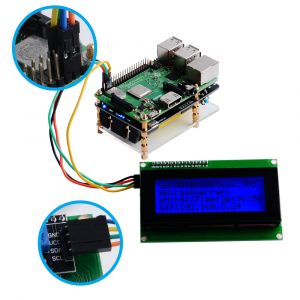
- LCD2004 communicates with Raspberry Pi via I2C protocol.
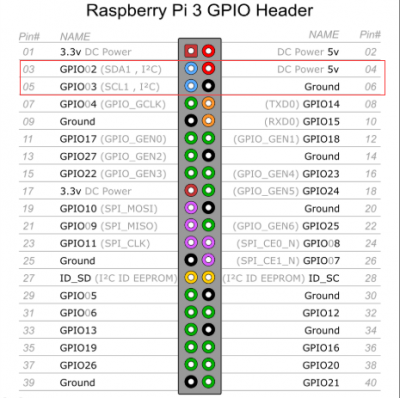
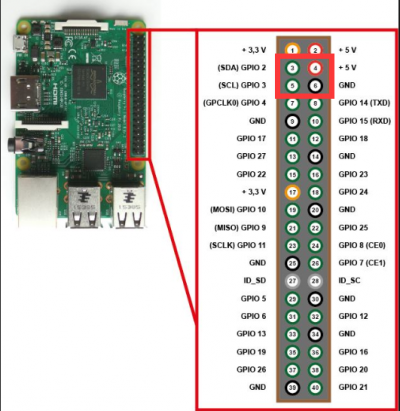
- Connect LCD2004 module to Raspberry Pi as following picture:
| I2C LCD2004 | Raspberry Pi |
|---|---|
| GND | GND |
| VCC | 5V |
| SDA | SDA |
| SCL | SCL |
How to test it
- Reference program writing:
(The following program can recognize the screen used for 27 address and 3F address at the same time)
Demo code in programming language C:
#include <Wire.h>
#include <LiquidCrystal_I2C.h>

void setup()
{
    byte error;
    Wire.begin();
    Wire.beginTransmission(0x27);
    error = Wire.endTransmission();
    if(error == 0){                      // If your device is 0x27
      LiquidCrystal_I2C lcd(0x27,20,4);
      lcd.init();
      lcd.backlight();
      lcd.setCursor(0,0);
      lcd.print("Device Addr = 0x27");
    }else{                               // If your device is 0x3F
      LiquidCrystal_I2C lcd(0x3F,20,4);
      lcd.init();
      lcd.backlight();
      lcd.setCursor(0,0);
      lcd.print("Device Addr = 0x3F");
    }
}

void loop(){}
- Compile it and run:
gcc get_register_address.c
./a.out
Demo code
- Raspberry Pi
1. Connect LCD2004 to Raspberry Pi's I2C Pins via jumpwire
2. Open a terminal and typing following command:
sudo apt-get update
sudo apt-get upgrade
3. Enable I2C function.
sudo raspi-config
Navigate to "Interface Option" and select "i2c" and enable it.
4.Download and install python-liquidcrystal_i2c library.
Download python-liquidcrystal_i2c/archive/master.zip and install it to Raspberry Pi as following command:
python -m easy_install --user https://github.com/pl31/python-liquidcrystal_i2c/archive/master.zip
- Second way to install library.
Or you can download it from here: [ http://wiki.52pi.com/index.php/File:Python-liquidcrystal_i2c-master.zip ]
Using python -m easy_install --user Python-liquidcrystal_i2c-master.zip to install it.
5. Write demo code and test it.
Copy and paste following code to a file named lcd2004.py:
#!/usr/bin/env python
"""first please add python library via this command: python -m easy_install --user https://github.com/pl31/python-liquidcrystal_i2c/archive/master.zip """
import socket
import os.path
import sys
import struct
import fcntl
import os
import time
import liquidcrystal_i2c
efg = "0"
wfg = "0"
lcd = liquidcrystal_i2c.LiquidCrystal_I2C(0x27, 1, numlines=4)
PATH1="/sys/class/net/eth0/carrier"
PATH2 = "/sys/class/net/wlan0/carrier"
def getserial():
    snm = "0000000000000000"
    try:
        f = open('/proc/cpuinfo','r')
        for line in f:
            if line[0:6]=='Serial':
                snm = line[10:26]
        f.close()
    except:
        snm = "ERROR"
    return snm

def getip(ifname):
    tt=0
    while tt<100:
        try:
            s = socket.socket(socket.AF_INET, socket.SOCK_DGRAM)
            return socket.inet_ntoa(fcntl.ioctl(s.fileno(),0x8915,struct.pack('256s',ifname[:15]))[20:24])
        except:
            tt+=1
            time.sleep(1)
            if(tt>99):
                return('ERROR')
time.sleep(15)
pstr= 'SN:'+getserial()
lcd.printline(0,pstr)
pstr = 'HN:'+socket.gethostname()
lcd.printline(1,pstr)
if os.path.isfile(PATH1) and os.access(PATH1, os.R_OK):
    efg = open(PATH1).read()
    pstr = 'EM:'+open('/sys/class/net/eth0/address').read()
    pstr = pstr.strip('\n')
    lcd.printline(2,pstr)
    if efg[0]=="1":
        pstr='EIP:'+str(getip('eth0'))
        lcd.printline(3,pstr)
    elif os.path.isfile(PATH2) and os.access(PATH2, os.R_OK):
        wfg = open(PATH2).read()
        pstr="WM:"+open('/sys/class/net/wlan0/address').read()
        pstr = pstr.strip('\n')
        lcd.printline(2,pstr)
        if wfg[0]=="1":
            pstr="WIP:"+str(getip('wlan0'))
            lcd.printline(3,pstr)
6. Test it
save it and run it.
python lcd2004.py
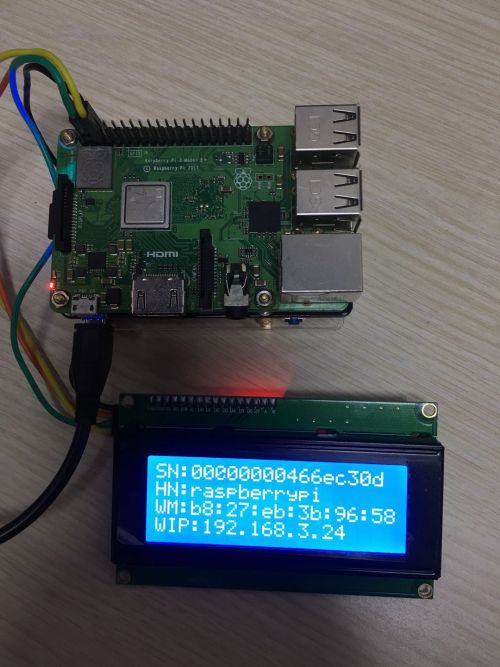
You will see your Raspberry Pi's Serial Number, Hostname, WiFi Mac address and WiFi IP address.
- Arduino
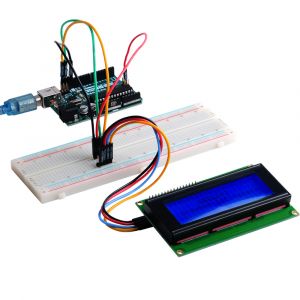
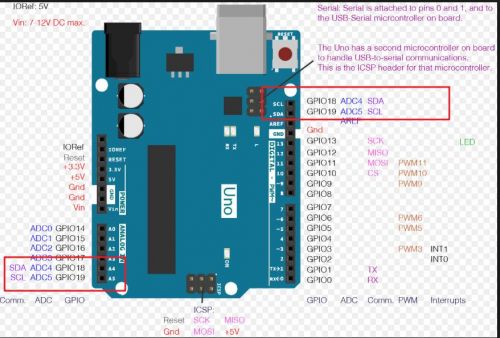
1. Connect LCD2004 to Arduino Uno:
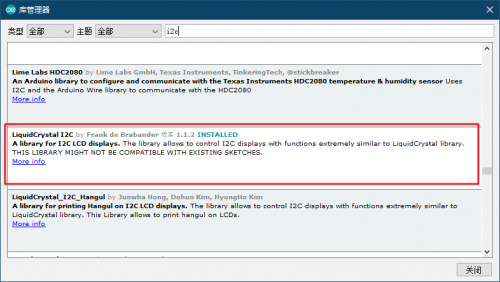
2. Download library from boardmanager and install following library:
3. Build Sketch file and upload to your Arduino Uno.
Open your Arduino IDE and then copy paste following code and select your port and the type of your board, press upload icon to upload sketch.
#include <Wire.h>
#include <LiquidCrystal_I2C.h>

LiquidCrystal_I2C lcd(0x27,20,4);  // set the LCD address to 0x27 for a 16 chars and 2 line display

void setup()
{
  lcd.init();                      // initialize the lcd
  lcd.init();
  // Print a message to the LCD.
  lcd.backlight();
  lcd.setCursor(0,0);
  lcd.print("--------------------");
  lcd.setCursor(6,1);
  lcd.print("GEEEKPI");
   lcd.setCursor(1,2);
  lcd.print("Arduino IIC Screen");
   lcd.setCursor(0,3);
  lcd.print("--------------------");
}

void loop()
{
// Just loop, do nothing.
}
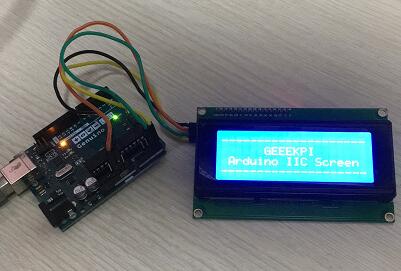
4. Connect Arduino to PC via USB cable, you will see:
Keywords
LCD2004, liquid crystal Display, Raspberry Pi display, i2c protocol display, LCD
