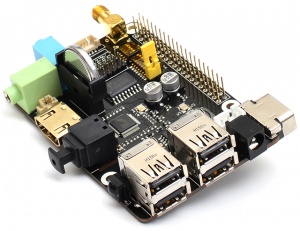
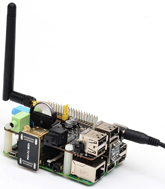
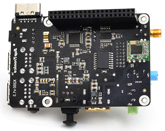
X200 SKU: EZ-0002
X200 EXPANSION BOARD
KEY FEATURES
| Parameters | Value |
|---|---|
| Input Voltage | 6V to 21Vdc converted to 5V, 3A via step-down DC/DC converter to power the Raspberry Pi |
| VGA output | HDMI to VGA converter supporting up to UXGA (1600×1200) and 1080p with 10-bit DAC |
| Audio | 3.5mm MIC in jack
- 3.5mm stereo audio jack - SPDIF output - Audio IO connector (Microphone input and stereo audio amplifier 3.3Wx2) |
| Wireless | WiFi (IEEE 802.11b/g/n) with external antenna
- IR sensor (38KHz) |
| USB Storage | Self-powered USB hub with 3 ports |
| Real-time clock (RTC) | Based on DS3231SN with included CR2032 battery |
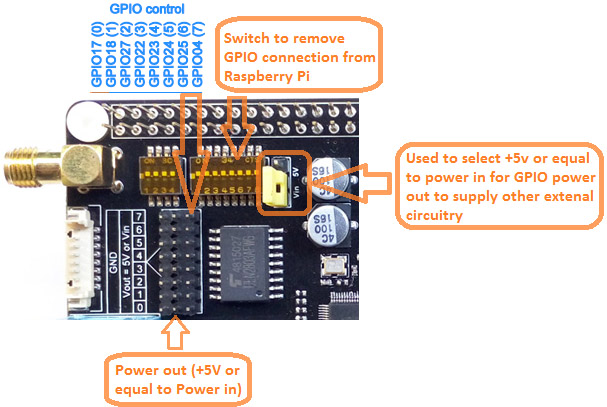
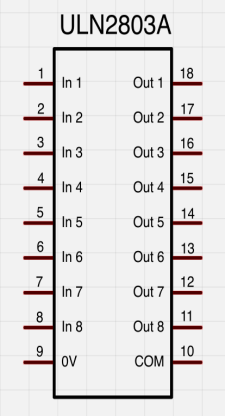
| GPIO Control | 8-channel Darlington driver chip (ULN2803) allowing to control electronic circuits which require more current |
| Misc | Power output socket
- Camera flex slot so camera can still be used with the expansion board attached - DIP switch to remove connection from RPi’s pin header - Directly connected on top of the Raspberry Pi using the board GPIO header pins - No wiring nor soldering is required - Duplicated the 40-pin header of the R-Pi in order to support existing expansion boards - Suitable for Raspberry Pi Model B+, Raspberry pi 2 Model B and Raspberry Pi 3 Model B NEW! |
| Dimensions | 85 x 56mm (Same size as Raspberry Pi) |
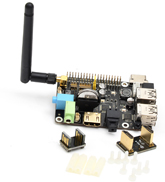
PACKING LIST
- 1 x X200 expansion board
- 1 x HDMI adapter
- 1 x USB adapter
- 1 x 2.4GHz WIFI antenna
- 4 x nylon spacers (M3 x 20mm)
- 8 x nylon screws (M3 x 6mm)
QUICK START GUIDE
 A. Fitting the expansion board
 B. Operation system
 C. Power supply
 D. HDMI to VGA converter
 E. Microphone input and audio output
 F. Audio input and output interface
 G. Setting RTC time
 H. Testing the IR reveiver
 I. ULN2803 8-channel RC servo port
A. FITTING THE EXPANSION BOARD
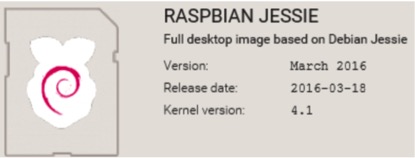
B. OPERATION SYSTEM
C. POWER SUPPLY
Xseries expansion board supplies the RPi with a regulated +5V through the GPIO header using a 2A poly-resettable (PTC) fuse.
With the wide voltage input range (6~21Vdc), the RPi can be powered from a wide variety of external sources such as batteries, 12V power adapters, solar battery sources, etc.
Recommended Power Adapter : 110~240VAC input, 12VDC 2A output
Dimension of input plug (Unit: mm)

D. HDMI TO VGA CONVERTER
See description on http://elinux.org/RPi_Screens#RGB_analog.2FVGA
Any HDMI to VGA adapter without external PSU might work for a time, but then burn out D1,
therefore Do not use HDMI converters powered by the HDMI port!
The solution is to either only use externally powered converters.
Xseries expansion board do not use power from RPi HDMI port and has many features that enable it to perform in a superior manner.
Among those features you will find:
Easy to Use: No need of cable and setting
Conversion: It can convert complete HDMI into VGA video
Supports 165MHz/1.65Gbps per channel (6.75Gbps all channel) bandwidth for HDMI Input
Supports Analogue Video output up to UXGA and 1080p with 10-bit DAC
HDMI to VGA resolution setting
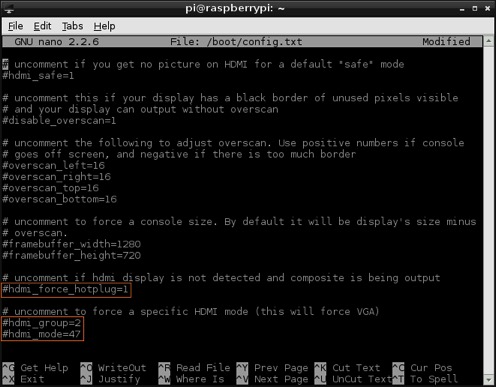
- <1> Open the Config.txt
pi@raspberrypi ~ $ sudo nano /boot/config.txt
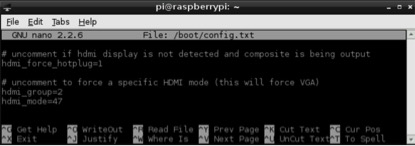
- <2> Uncomment following three lines in config.txt by removing '#' located at start of the line. (check Images below)
hdmi_force_hotplug=1      pretends that HDMI device is always attached
hdmi_group                            specifies whether monitor is DMT type (Computers) or CEA type (TV)
hdmi_mode                            specifies the resolution of monitor.
- <3> For hdmi_group value selection : If you’re using output as Computer monitor then replace value ’1′ with ’2′, so the new config will be like :
hdmi_group=2
(Select value 1 for TV, Select value 2 for monitor)
- <4> For hdmi_mode value selection : Now open eLinux RPi config scroll down, there in hdmi_mode two tables are given, select the correct resolution as per your monitor. (Table1 if you’re using TV & Table2 if you’re using Monitor)
Since my monitor’s resolution is 1440×900 px, hdmi_mode=47 fits me the best. So, the modified config.txt will be like.
hdmi_mode=47
Overall my uncommented lines will look something like :
- <5> Save your changes by pressing Ctrl-x then Y
- <6> Reboot your Raspberry Pi
pi@raspberrypi ~ $ sudo reboot
E. MICROPHONE INPUT AND AUDIO OUTPUT
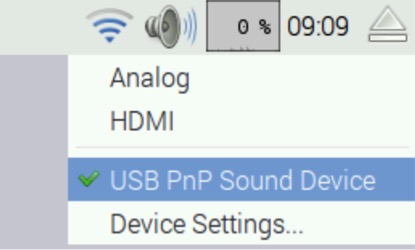
- <7>To configure X200 sound card as the default audio device.
Right-click the volume icon, a pop-up menu appears to allow you to select "USB PnP Sound Device".
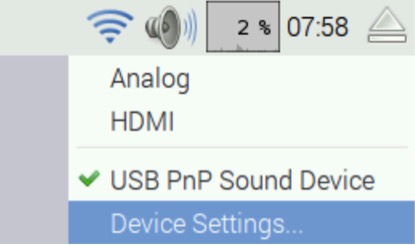
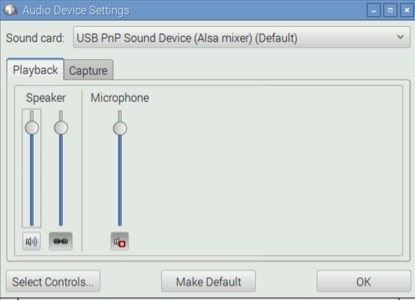
- <8> Click "Device Settings..." to allow more detailed control of the X300 audio devices – you can access this either under Device Settings from the volume right-click menu or from the Preferences section of the main menu, where it is listed as Audio Device Settings.
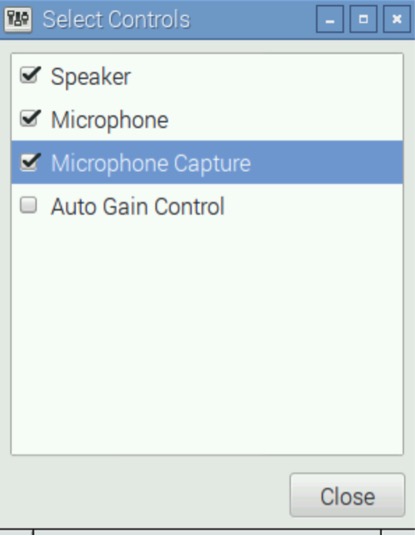
- <9> From this dialog, select the device you want to control from the drop-down at the top, and then press the Select Controls button to choose which of the controls the device offers that you want to display. Pressing the Make Default button on this window has the same effect as choosing an output source in the volume right-click menu.
- <10> Let's record the sound with LXterminal
pi@raspberrypi ~ $ arecord -D plughw:1,0 -f cd test.wav
- <11> Press Ctrl + C to abort recording
- <12> Playback the recording with aplay
pi@raspberrypi ~ $ aplay test.wav
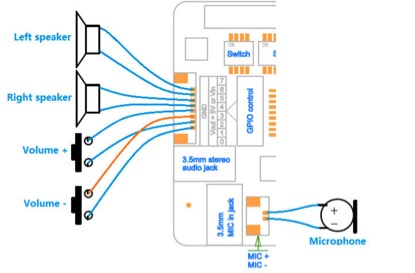
F. AUDIO INPUT AND OUTPUT INTERFACE
G. SETTING RTC TIME
This page details how to setup the RTC Pi on the Raspbian Jessie image from http://www.raspberrypi.org/downloads
- <13> Ensure that the CR2032 coin battery was inserted into the battery holder. Using the expansion board without a battery installed may damage the RTC chip and will stop it from appearing on the I2C bus.
- <14> Follow the instructions on how to install and configure I2C on Raspbian Linux.
- <15> Once you have installed I2C check that the RTC Pi has been detected using:
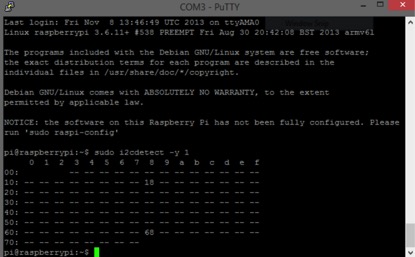
pi@raspberrypi ~ $ sudo i2cdetect -y 1
The RTC Pi should appear on channel 68 as shown in the screen shot below.
If the RTC Pi does not appear check that the battery is installed correctly and is fully charged:
- <16> Enable I2C by running:
pi@raspberrypi ~ $ sudo nano /etc/modprobe.d/raspi-blacklist.conf
Find the I2C line where the I2c is black listed
blacklist i2c-bcm2708
Comment it out by replacing it with the line below
#blacklist i2c-bcm2708
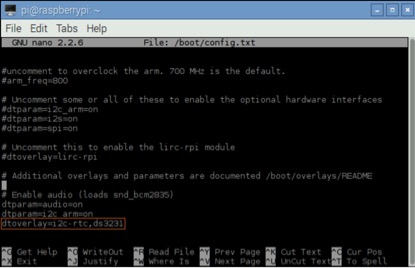
- <11> To ensure that the necessary kernel modules are loaded at boot, ensure your /boot/config.txt file has the entry below …
pi@raspberrypi ~ $  sudo nano /boot/config.txt
dtoverlay=i2c-rtc,ds3231
- <17> Save your changes by pressing Ctrl-x then Y
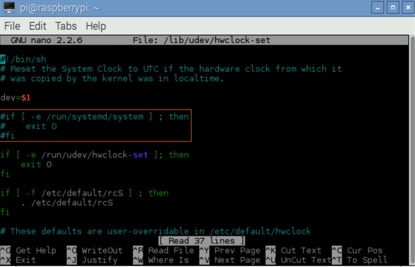
- <18> Edit /lib/udev/hwclock-set with
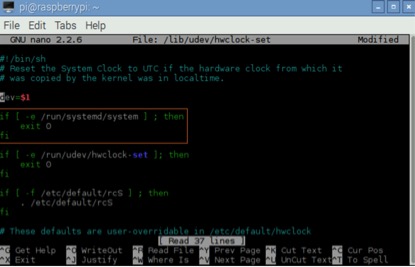
pi@raspberrypi ~ $ sudo nano /lib/udev/hwclock-set
- <19> Locate the lines and edit
- <20> Comment following three lines in config.txt by adding '#' located at start of the line. (check Images below)
- <21> Save your changes by pressing Ctrl-x then Y
- <22> Reboot your Raspberry Pi
pi@raspberrypi ~ $ sudo reboot
- <23> Get the right time set on the Pi ,
pi@raspberrypi ~ $ sudo date MMDDHHMMYYYY.SS
              (MM= Month, DD= Date, HH= Hour, MM= Minute, YYYY= Year, SS= Second )
                                          example:  2013 Jan 4 , 11:39:00 , sudo date 010411392013.00
- <24> Write the system time to the expansion board,
pi@raspberrypi ~ $ sudo hwclock -w
- <25> Verify the time ,
pi@raspberrypi ~ $ sudo hwclock -r
If everything worked correctly the expansion board should be initialised on boot and the current date and time will be loaded into Linux.
H. TESTING THE IR RECEIVER
- <25> Installing LIRC
pi@raspberrypi ~ $ sudo apt-get install lirc
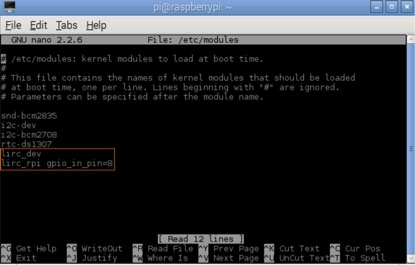
- <26> Add the two lines below to /etc/modules . This will start the modules up on boot. Pin 8 bellow will be used to take the output from the IR sensor.
pi@raspberrypi ~ $ sudo nano /etc/modules
lirc_dev
lirc_rpi gpio_in_pin=8
- <27> Save your changes by pressing Ctrl-x then Y
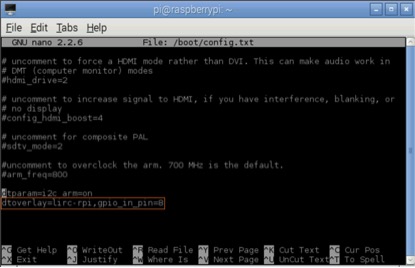
- <28> Edit your /boot/config.txt file
pi@raspberrypi ~ $ sudo nano /boot/config.txt
and add:
dtoverlay=lirc-rpi,gpio_in_pin=8
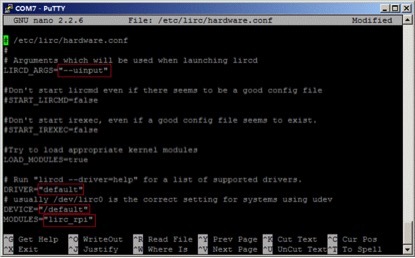
- <29> Edit /etc/lirc/hardware.conf and have it appear exactly as shown below.
pi@raspberrypi ~ $ sudo nano /etc/lirc/hardware.conf
# /etc/lirc/hardware.conf
#
# Arguments which will be used when launching lircd
LIRCD_ARGS="--uinput"
# Don't start lircmd even if there seems to be a good config file
# START_LIRCMD=false
# Don't start irexec, even if a good config file seems to exist.
# START_IREXEC=false
# Try to load appropriate kernel modules
LOAD_MODULES=true
# Run "lircd --driver=help" for a list of supported drivers.
DRIVER="default"
# usually /dev/lirc0 is the correct setting for systems using udev
DEVICE="/dev/lirc0"
MODULES="lirc_rpi"
# Default configuration files for your hardware if any
LIRCD_CONF=""
LIRCMD_CONF=""
The highlighted text are the parts that will need changing, though it’s worth checking the rest of the text incase you have a different initial configuration.
- <30> Save your changes by pressing Ctrl-x then Y
- <31> Reboot the Raspberry Pi
pi@raspberrypi ~ $ sudo reboot
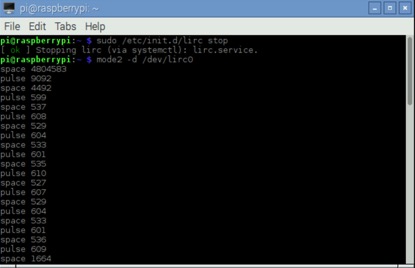
- <32> Run these two commands to stop lircd and start outputting raw data from the IR receiver:
pi@raspberrypi ~ $ sudo /etc/init.d/lirc stop
pi@raspberrypi ~ $ mode2 -d /dev/lirc0
- <33> Point a remote control at your IR receiver and press some buttons. You should see something like this:
I. ULN2803 8-CHANNEL RC SERVO PORT
Bring in some muscle to your output pins with 8 mighty Darlingtons!
This driver chip contains 8 drivers that can sink 500mA from a selectable 5V or DC input voltage supply and has kickback diodes included inside for driving coils.
This will let your little microcontroller or microcomputer power solenoids, DC motors (in one direction) and unipolar stepper motors.
The GPIO Pins are connected to ULN2803 inputs through a DIP switch, with the its outputs going to two array of Wire-to-Board header.
Alternatively, these ports can be used to supply +5V or input voltage to other external circuitry, or embedded devices.

Please note that this is an 'open collector' driver - it can only be used to connect the load to ground and there will be a 1 Volt (or more) 'drop' across the internal transistors.
You can Download here:
File:ULN2803 SCH x200.pdf
File:Raspberry Pi GPIO Pin numbering.pdf
File:ULN2803APG datasheet en 20121126.pdf
Optional driver to install - WiringPi
- <34> Install GIT
pi@raspberrypi ~ $ sudo apt-get install git-core
- <35> Download WiringPi
pi@raspberrypi ~ $ git clone git://git.drogon.net/wiringPi
- <36> Enter the directory of wiringPi
pi@raspberrypi ~ $ cd wiringPi
- <37> Install wiringPi
pi@raspberrypi ~ $ ./build
- <38> Test GPIO port
pi@raspberrypi ~ $ gpio mode x out (x = 0~7)
pi@raspberrypi ~ $ gpio write x 1 (x=0~7, 1=On)
pi@raspberrypi ~ $ gpio write x 0 (x=0~7, 0=off)
