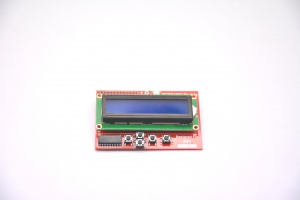
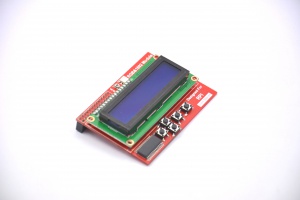
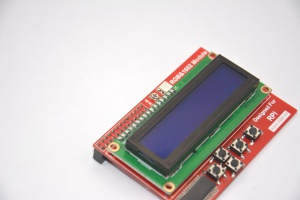
RPI 16x2 LCD+Keypad Kit SKU:Z-0019
RPI 16x2 LCD Keypad Kit
Description
It's a LCD display which can show two lines and 16 characters on it. and it easy to use a blue and white 16x2 Character LCD.
It's based on I2c protocol and it can communicate with your Pi with less wire.
With this in mind, we wanted to make it easier for people to get these LCD into their projects so we devised a Pi plate that lets you control a 16x2 Character LCD,
up to 3 led pins(rgb led) AND 5 keypad pins using only the two I2C pins on the R-Pi!
The best part is you don't really lose those two pins either, since you can stick i2c-based sensors, RTCs, etc and have them share the I2C bus.
This is a super slick way to add a display without all the wiring hassle.
This pi plate is perfect for when you want to build a stand-alone project with its own user interface.
The 4 directional buttons plus select button allows basic control without having to attach a bulky computer.
The plate is designed for both Revision 1 and Revision 2 Raspberry Pi's. It uses the I2C (SDA/SCL) pins.
To keep them from shorting against the metal, a piece of electrical tape must be placed onto the USB ports.
Attention:due to the new version of MCP23017, may not support the extended pull-up resistor on the IO.and LCD16x2+Keypad not support for Pi 3.
Feature
- Display construction: 16 Characters * 2 Lines
- Dimensions: 5.74cm × 8.24cm
- Comes with a 16x2 Blue & White LCD
- Plug and play with any Raspberry Pi (Do Not fit for RPI2/RPI3)
- Uses only the I2C (SDA/SCL) pins
- This board/chip uses I2C 7-bit address 0x20
Presentation
Package includes
- 1x RPI 16x2 LCD + Keypad Kit
How to use
- Setup your Pi with I2C tool.
sudo apt-get install python-smbus
sudo apt-get install i2c-tools
sudo i2cdetect -y 0 (if you are using a version 1 Raspberry Pi)
sudo i2cdetect -y 1 (if you are using a version 2 Raspberry Pi)
- i2c-tools isn't strictly required, but it's a useful package since you can use it to scan for any I2C or SMBus devices connected to your board.
If you know something is connected, but you don't know it's 7-bit I2C address, this library has a great little tool to help you find it.
- Install git-core and get wiringPi library.
sudo apt-get install git-core
git clone git://git.drogon.net/wiringPi
cd wiringPi
./build
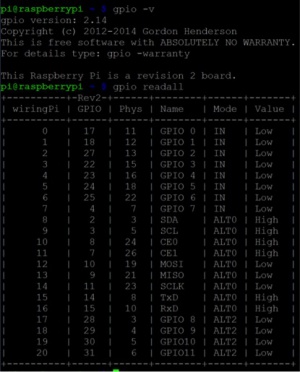
- Check wiringPi function and version:
gpio -v
gpio readall
- Enable I2C interface in your Pi by editing /etc/modules file and add two lines as following:
sudo nano /etc/modules
i2c-bcm2708
i2c-dev
- Delete blacklist in /etc/modprobe.d/raspi-blacklist.conf, you can just use "#" to comment it.
sudo nano /etc/modprobe.d/raspi-blacklist.conf
blacklist spi-bcm2708
blacklist i2c-bcm2708
- Finally, reboot your Pi.
- Create a file called whatever you want but with .c as prefix:
sudo vim.tiny mylcd1602.c
#include <stdio.h>
#include <wiringPi.h>
#include <mcp23017.h>
#include <lcd.h>

int main()
{
        int display,i,count;
        wiringPiSetup();
        mcp23017Setup (100, 0x20);
        printf ("Raspberry Pi - MCP23017 Test\n");
        for(i=0;i<16;i++)
          pinMode(100+i,OUTPUT);
        digitalWrite(107,1);
        digitalWrite(101,0);
        display=lcdInit(2,16,4,100,102,103,104,105,106,0,0,0,0);
        lcdHome(display);
        lcdClear(display);
        lcdPosition(display,0,0);
        lcdPuts(display,"Hello World");
        while(1)
        {
                lcdPosition(display,0,1);
                lcdPrintf(display,"%d",count++);
                delay(300);
                printf("lcd1602\n");
        }
}
- Compile it with gcc, and run it.
sudo gcc mylcd1602.c /home/pi/wiringPi/devLib/lcd.o -lwiringPi -o mylcd1602
sudo ./mylcd1602


