EP-0107
ICE-Tower CPU Cooling Fan for Raspberry Pi
Description
According to Moore's law, the design of high-speed and high-density printed circuit board (PCB) is becoming more and more complex.
Higher processing performance will generate more heat.
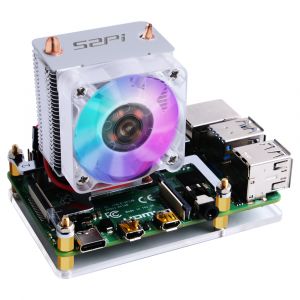
This super ICE Tower CPU Cooling Fan for Raspberry Pi is created for solving heat dissipation problem!
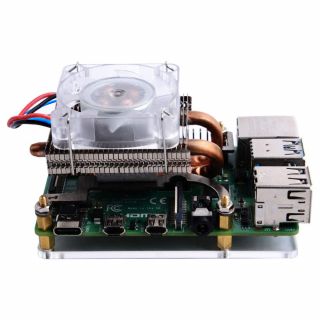
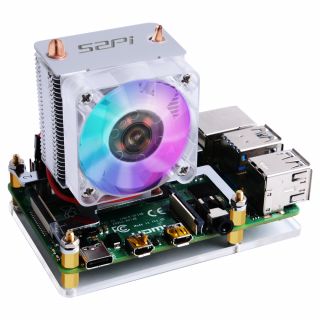
Tower structure, 5mm copper tube, multi-layer heat sinks, 7 blades powerful fan, all the above combinations make this super radiator for Raspberry Pi.
In the case of overclocking, it can reduce the temperature of the Raspberry Pi from 80℃ to 40℃.
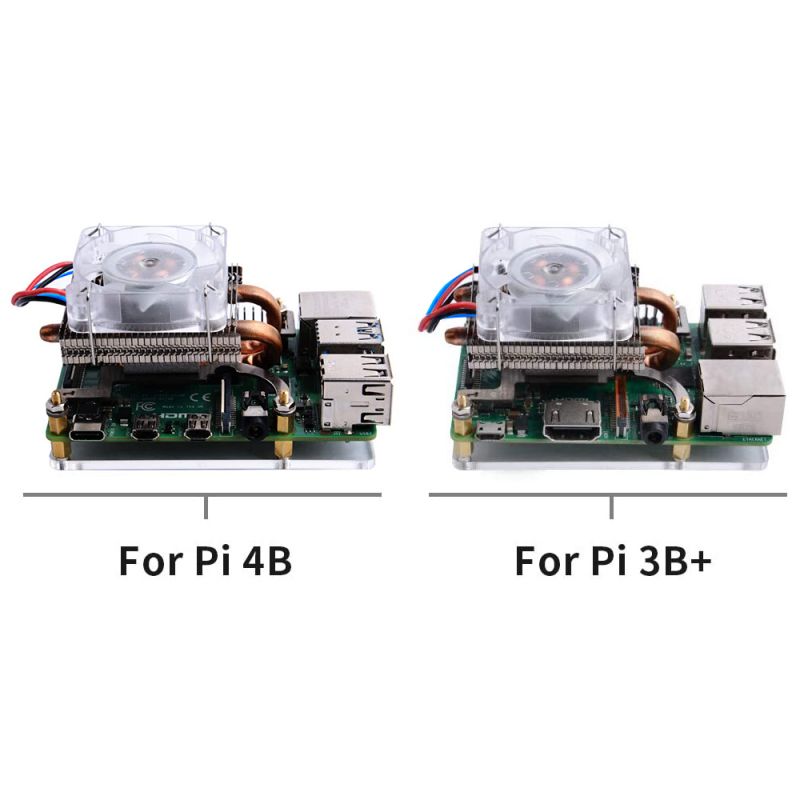
Best of all, this super cooling fan support both Raspberry Pi 3B+ and the new Raspberry Pi 4B.
When the fan turns up, you will see the color of ice.
The tower fan has 7 different color LEDs that change automatically, making your fan more beautiful and personalized.
Features
- DC 5V Power in (Can be powered by the Raspberry Pi)
- Ice Tower Structure
- 5mm copper tube
- Super heat dissipation
- Rated power 0.4W @5V, 0.08A
- Super Cool fan background light (RGB Color)
- Easy to setup
- Compatible with Raspberry Pi 3B+/4B
Adjustable Speed Fan (Upgrade version)
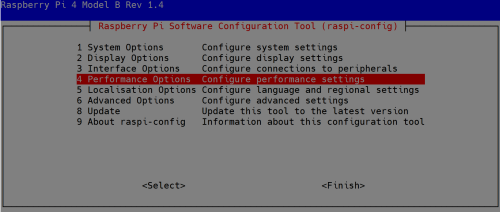
This is a fan that supports PWM pulse width modulation signal to control the speed, suitable for various DIY environments, you can program the blue pin and control the fan speed through the PWM signal. If you connect it to your Raspberry Pi, the latest Raspberry Pi OS will support Fan speed control via CPU temperature function, and you need to enable it by using raspi-config tool.
ChangeLog
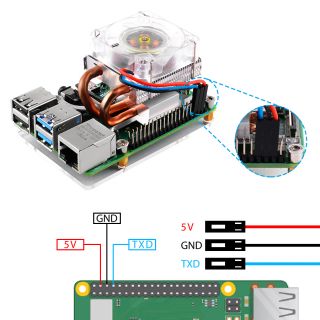
- Upgrade to 3 wire control, Red wire connect to 5V, Black wire connect to GND, Blue wire connect to GPIO(which support PWM signal output)
- Support PWM signal control fan speed.(Need programming)
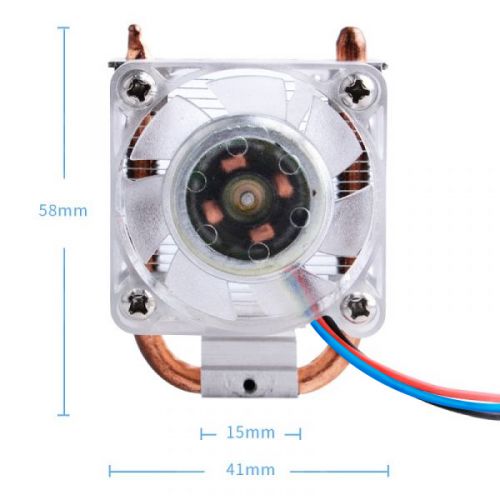
Dimensions
Gallery
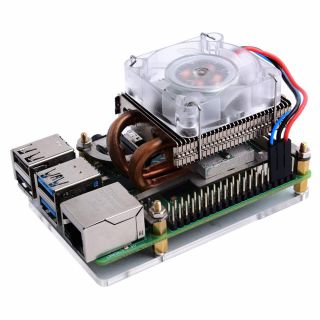
Product Outlook
How to connect it to RPi
How to assemble
Raspberry Pi 3B+
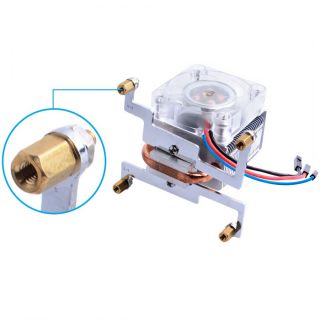
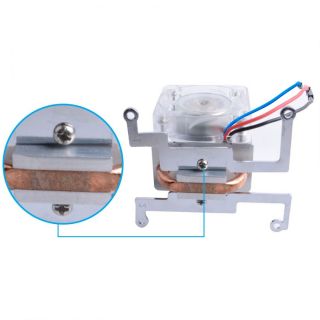
- 1. Fixed the steel mounting fixer to radiator's heat dissipation cube with M2.0 screws
- 2. Fixed the steel mounting fixer to Raspberry Pi 3B+’s mounting hole with M2.5 copper stick, and please make sure the heat dissipation is contact to CPU shield properly.
- 3. Fixed the copper stick to Raspberry Pi with M2.5 nuts.
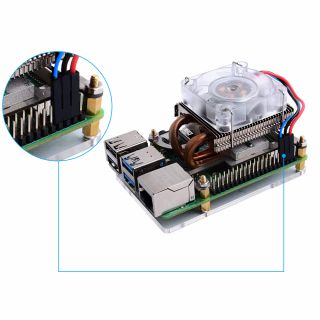
- 4. Connect the red wire to GPIO 5V pin and black wire to GPIO GND pin.
Raspberry Pi 4B
- 1. Fixed the steel mounting fixer to radiator's heat dissipation cube with M2.0 screws
- 2. Fixed the steel mounting fixer to Raspberry Pi 4B’s mounting hole with M2.5 copper stick, and please make sure the heat dissipation is contact to CPU shield properly.
- 3. Fixed the copper stick to Raspberry Pi with M2.5 nuts.
- 4. Connect the red wire to GPIO 5V pin and black wire to GPIO GND pin.
How to control fan speed
Method 1
- Controled by Raspberry Pi OS:
We assume you have a Raspberry Pi OS installed.
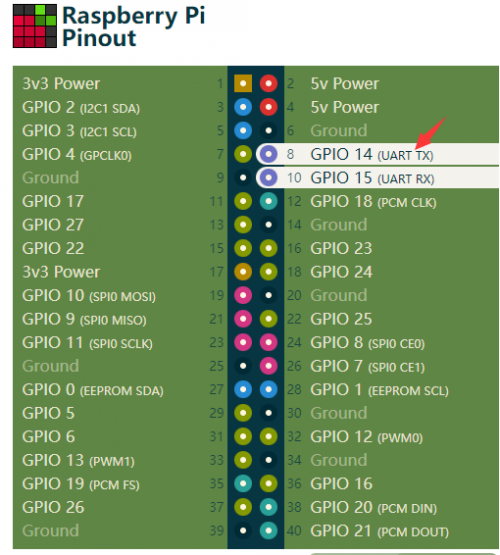
1.Make sure you have already connected the Red wire to 5V, Black wire to GND pin, and Blue Wire to GPIO 14 (TXD).
2. Turn on Raspberry Pi and login, open a terminal and enable Fan control as following Steps:
Typing following command in terminal:
sudo raspi-config
3. Navigate to "Performance options"
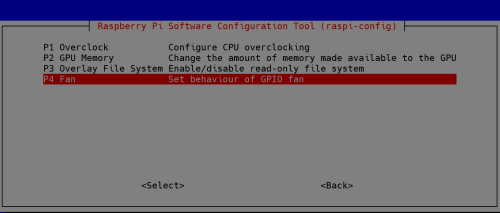
4. Navigate to "Fan"
5. Select "yes"
6. Input "14" means using GPIO 14 as PWM output Pin.
7. Change threashold trigger temperature to 60 degrees.
8. Confirm it.
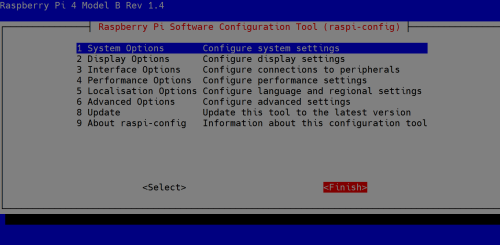
9. Navigate to Finish and reboot Raspberry Pi as it required to take effect.
NOTE:
In this case, the fan will be triggered to rotate only when the CPU temperature of the Raspberry Pi reaches 60 degrees, otherwise the fan will not spin.
Method 2
How to enable it via Programming
- Make sure RPi.GPIO library has been installed.
pip freeze |grep RPi.GPIO
If feedback is:
RPi.GPIO==0.7.0
means library is OK.
- Open a terminal and create a file named: pwm-fan-control.py
- Copy and paste following code into the file and save it.
import RPi.GPIO as GPIO
import time
import subprocess

GPIO.setmode(GPIO.BCM)
GPIO.setup(14, GPIO.OUT)
pwm = GPIO.PWM(14,100)

print("\nPress Ctrl+C to quit \n")
dc = 0
pwm.start(dc)

try:
    while True:
        temp = subprocess.getoutput("vcgencmd measure_temp|sed 's/[^0-9.]//g'")
        print("Current CPU Temperature is: %f degree", temp)
        if round(float(temp)) >= 40:
            dc = 100
            pwm.ChangeDutyCycle(dc)
            time.sleep(0.05)
        else:
            dc = 0
            pwm.ChangeDutyCycle(dc)
            time.sleep(0.05)
except KeyboardInterrupt:
    pwm.stop()
    GPIO.cleanup()
    print("Ctrl + C pressed -- Ending program")
- Execute it by typing:
python3 pwm-fan-control.py
- The fan will be turned on when the CPU temperature is reached to 40 degrees.
Package Include
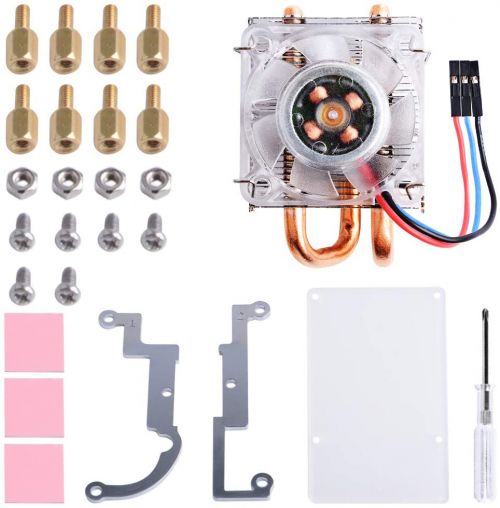
- 1 x Ice Tower radiator and Fan
- 2 x Steel Mounting brackets
- 8 x M2.5x6 Copper sticks
- 4 x M2.5 Nuts
- 6 x M2.5x4 screws
- 3 x Thermal Tape
- 1 x Screw Driver
- 1 x Protective Acrylic Panel
PS: Product does not contain thermal silicone grease, but if you have thermal silicone the dispassion effect will be better.
Customer Review
- YOUTUBE URL:
- [ https://youtu.be/9lqkllZiXN4 ]
- [ https://www.youtube.com/watch?v=3Eiq7k7Sekc ]
- [ https://www.youtube.com/watch?v=Rs1SnojIyDk ]
- [ https://www.youtube.com/watch?v=FciNotr6d6g ]
- [ https://www.youtube.com/watch?v=hWvd7foeICg ]
- [ https://www.youtube.com/watch?v=e6mWImsF9iI ]
- [ https://www.youtube.com/watch?v=wn0-w1M9puk ]
- [ https://www.youtube.com/watch?v=7YRnQ09fGWI ]
- [ https://www.youtube.com/watch?v=OiRD7WWvTQg ]
- [ https://www.youtube.com/watch?v=lD7t-IGLjVM ]
- [ https://www.youtube.com/watch?v=tie6r5ymUug ]
- Instructable:
FAQ
- Q: Can it be install to my retroflag case?
A: No, the dimension is too big.
- Q: How many degrees can be decreased ?
A: We've tested it at room temperature 25℃, it can decreased about 40℃.
- Q: Does it easy to assemble?
A: Yes, it is very easy to install, we've provided an instruction for you.
