EP-0072
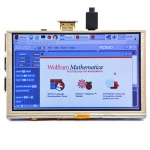
5 Inch 800 x 480 HDMI TFT LCD Touch Screen for Raspberry Pi
Description
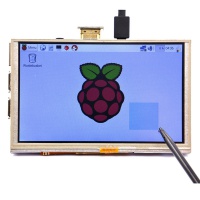
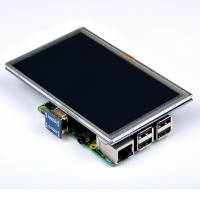
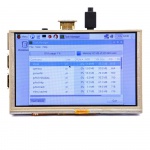
This 5 inch HDMI TFT LCD touch screen is especially designed for Raspberry Pi. We have updated the Image and User Manual for the Latest Raspberry Pi 3.You can download the image to use this screen directly or follow the steps to configure your own system. Check out the User Manual for more details.
Compatibility List
- Compatibility
| Platform | Version 2.02 | Notes |
|---|---|---|
| Raspberry Pi 3 Model B Plus | √ | |
| Raspberry Pi 3 Model B | √ | |
| Raspberry Pi 2 Model B | √ |
Features:
- 800×480 resolution(HD)
- Support touch control
- Compatible with all models of Raspberry Pi
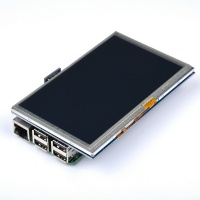
- Can Be plugged directly into any version of Raspberry Pi except for first generation Pi Model B which requires an HDMI cable
- User Manual and official Raspberry Pi drive available.
- Support any Raspberry Pi Image, Ubuntu, Linux Mint, Win 10 IOT and other systems.
- Universal HDMI display is not limited to raspberry pi (with resolution configuration When you use this screen for display function only, it does not occupy any I/O. When you use the touch function, it takes some I/O.
- NOTE: It's Raspberry Pi Only.
Parameters:
- Power: 5V Power via GPIO from Raspberry pi
- Display Type: 5 inch TFT LCD
- Resolution: 800x480
- Touchscreen: SPI Via Raspberry pi
- Dimensions: 120mm x 74mm x 7mm
- Net Weight without package: 125g
- Weight with package: 145g
Package Includes:
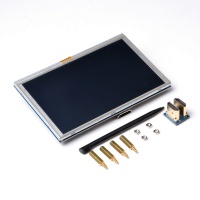
- 1x 5 inch HDMI LCD
- 1x HDMI Connector
- 1x Touch Pen
- 1x RPi Screws Pack (4pcs)
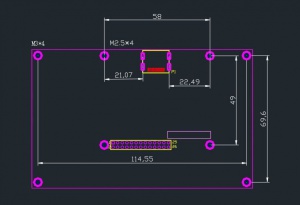
Mechanical Drawing
Applications
some makers like to build funny things, something like make a retroPie game box or make it as XBMC, MiniPC and so on...
Documents
Download Readme : File:5inch Touch Screen Readme.pdf
Download User Manual: File:5 inch (with TS) 800x480 Resolution Setting Tutorial.pdf
Download User Manual: File:Touch Screen Calibration Tutorial.pdf
- How to wire up:
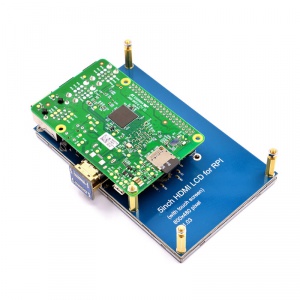
- 1.Connect Raspberry Pi mainboard to the screen on GPIO pins, please align to HDMI port.
- 2.Connect Raspberry Pi and screen with HDMI converter, as following picture:
IMPORTANT
Raspberry Pi must be connected to internet so that the calibration software can be download, Please refer to the document which our wiki provided.
How to adjust resolution of the screen
- 5 inch (with TS) screen Resolution Setting Tutorial
- How to set resolution in Raspberry Pi?
- 1. Download Raspbian image and burn your TF card by win32_disk_imager or other tools.
- [Raspbian Image Download Link| https://www.raspberrypi.org/downloads/raspbian/ ]
- 2. Login to your Raspberry Pi and edit /boot/config.txt file, make sure it has following parameters:
- How to set resolution in Raspberry Pi?
framebuffer_width=800
framebuffer_height=480
hdmi_force_hotplug=1
hdmi_group=2
hdmi_mode=87
hdmi_edid_file=1
hdmi_cvt  800  480  60  6  0  0  0
dtoverlay=ads7846,penirq=22,speed=100000,xohms=150
dtparam=spi=on
PS: Please change “device_tree” type according to your Raspberry Pi’s version as following list:
| Device Tree Type | Product Model | |
|---|---|---|
| bcm2708-rpi-b-plus.dtb | → | Raspberry Pi B+ |
| bcm2708-rpi-b.dtb | → | Raspberry Pi B |
| bcm2709-rpi-2-b.dtb | → | Raspberry Pi 2 mode B |
| bcm2710-rpi-3-b.dtb | → | Raspberry Pi 3 mode B |
- 3. Download this edid.dat file and unzip it, and then upload it to /boot/ folder.
Very Important: [Download edid.dat file |http://wiki.52pi.com/images/a/af/Edid.dat.zip]
- For example:
The su command is used to become another user during a login session.
Invoked without a username, su defaults to becoming the superuser.
The optional argument - may be used to provide an environment similar to what the user would expect had the user logged in directly.
sudo su -
And please just input your Pi user's password and press enter.
- Download edid.dat.zip file.
wget http://wiki.52pi.com/images/a/af/Edid.dat.zip
- unzip it and move it to /boot folder
unzip Edid.dat.zip
sudo mv edid.dat /boot
How to setup Resolution Automatically(New)
There is a easy way to setup resolution of your screen by a shell script, you can download the scripts by git tool and use it to change resolution for your screens as following steps:
git clone https://github.com/geeekpi/lcd-config.git
cd ~/lcd-config/
chmod +x resolution_tool.sh
sudo bash resolution_tool.sh
and then follow the step to chose the screen type that you have, and it will automatically setup the resolution for you.
Reboot your Raspberry Pi and have fun.
How to calibrate Touch Screen Automatically(NEW)
git clone https://github.com/geeekpi/lcd-config.git
cd ~/lcd-config/
sudo chmod +x calibration_tool.sh
sudo bash calibration_tool.sh
and then follow the step to chose the screen type that you have, and it will automatically setup the resolution for you.
Reboot your Raspberry Pi and have fun.
- 2 After rebooting, open a terminal and typing this command :
DISPLAY=:0.0 xinput_calibrator
Press the cross sign on the screen,it will calculate the position parameters and it will display on your screen.
DO REMEMBER to copy and paste it into a file under /etc/X11/xorg.conf.d/99-calibration.conf file and reboot your system.
If you do not want to setup and configure the config.txt file, you can just download the image and burned it into your TF card, then insert it into your Pi and boot it up.
- Image File Download:
https://www.dropbox.com/s/43mnj057kmcybyu/PI-HDMI5B-tester-Build-201650331-Raspbian-GNOME.7z?dl=0
Related Video Tutorial
| How to assemble Acrylic case with cooling fan: | http://wiki.52pi.com/index.php/How_to_assemble_Acrylic_case_with_cooling_fan] |
| How to install heat sink on Raspberry Pi: | http://wiki.52pi.com/index.php/How_to_install_heat_sink_on_Raspberry_Pi] |
| How to setup the Resolution & how to calibrate touch screen: | http://wiki.52pi.com/index.php/How_to_Calibrate_your_touch_screen#How_to_calibrate_touch_screen_on_Raspberry_Pi] |
3D Print File
- You can make an OctoPi control center by making a 3D printed case for your raspberry Pi. please download from this
link below:
(http://www.thingiverse.com/thing:1712906)
FAQ
- Q: Can this be plugged straight into a graphics card?
A: No.
- Q: Would the display work as a pure monitor over hdmi?
A: Yes,it will be a nice monitor via HDMI and you can also enable the touch screen.
- Q: I would like to know how can I change the brightness and contrast?
A: I'm so sorry about that, you can not change the brightness and contrast.
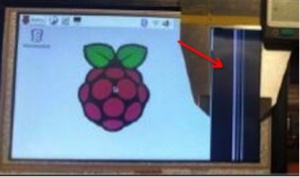
- Q: There is a blank space on the right side of the screen, is that broken ?
A:Please try to setup your resolution and try again.
- Q: why dose it appear white screen when i power up my Raspberry Pi ?
A: Please check FPC cable and make sure your power supply can provide 5v-2.5A output, and we strongly advise that you should use the high quality HDMI wire cable(original version).
- Q: how to setup the resolution of my screen?
A: just follow the PDF file and edit the /boot/config.txt file and reboot your system.
- Q: The Pi works fine plugged into a big screen TV, and it worked for a short time when connect to the 5 inch screen, then it quit and won't light up at all. Completely dead screen. But still works with TV.
A: Please check the HDMI converter is plugged in, and make sure the power supply is 5v-2.5A, if it's still out of work, please reset the resolution by edit /boot/config.txt in HDMI_mode parameter.
- Reference: You can edit /boot/config.txt file and modify the value of mode ,for example: “hdmi_mode=16” .
For example :640x480 60Hz, means “hdmi_mode=4” here is a list about mode number and resolution:
- These values are valid if hdmi_group=2 (DMT)
- hdmi_mode=1 640x350 85Hz
- hdmi_mode=2 640x400 85Hz
- hdmi_mode=3 720x400 85Hz
- hdmi_mode=4 640x480 60Hz
- hdmi_mode=5 640x480 72Hz
- hdmi_mode=6 640x480 75Hz
- hdmi_mode=7 640x480 85Hz
- hdmi_mode=8 800x600 56Hz
- hdmi_mode=9 800x600 60Hz
- hdmi_mode=10 800x600 72Hz
- hdmi_mode=11 800x600 75Hz
- hdmi_mode=12 800x600 85Hz
- hdmi_mode=13 800x600 120Hz
- hdmi_mode=14 848x480 60Hz
- hdmi_mode=15 1024x768 43Hz DO NOT USE
- hdmi_mode=16 1024x768 60Hz
- hdmi_mode=17 1024x768 70Hz
- hdmi_mode=18 1024x768 75Hz
- hdmi_mode=19 1024x768 85Hz
- hdmi_mode=20 1024x768 120Hz
- hdmi_mode=21 1152x864 75Hz
- hdmi_mode=22 1280x768 reduced blanking
- hdmi_mode=23 1280x768 60Hz
- hdmi_mode=24 1280x768 75Hz
- hdmi_mode=25 1280x768 85Hz
- hdmi_mode=26 1280x768 120Hz reduced blanking
- hdmi_mode=27 1280x800 reduced blanking
- hdmi_mode=28 1280x800 60Hz
- hdmi_mode=29 1280x800 75Hz
- hdmi_mode=30 1280x800 85Hz
- hdmi_mode=31 1280x800 120Hz reduced blanking
- hdmi_mode=32 1280x960 60Hz
- hdmi_mode=33 1280x960 85Hz
- hdmi_mode=34 1280x960 120Hz reduced blanking
- hdmi_mode=35 1280x1024 60Hz
- hdmi_mode=36 1280x1024 75Hz
- hdmi_mode=37 1280x1024 85Hz
- hdmi_mode=38 1280x1024 120Hz reduced blanking
- hdmi_mode=39 1360x768 60Hz
- hdmi_mode=40 1360x768 120Hz reduced blanking
- hdmi_mode=41 1400x1050 reduced blanking
- hdmi_mode=42 1400x1050 60Hz
- hdmi_mode=43 1400x1050 75Hz
- hdmi_mode=44 1400x1050 85Hz
- hdmi_mode=45 1400x1050 120Hz reduced blanking
- hdmi_mode=46 1440x900 reduced blanking
- hdmi_mode=47 1440x900 60Hz
- hdmi_mode=48 1440x900 75Hz
- hdmi_mode=49 1440x900 85Hz
- hdmi_mode=50 1440x900 120Hz reduced blanking
- hdmi_mode=51 1600x1200 60Hz
- hdmi_mode=52 1600x1200 65Hz
- hdmi_mode=53 1600x1200 70Hz
- hdmi_mode=54 1600x1200 75Hz
- hdmi_mode=55 1600x1200 85Hz
- hdmi_mode=56 1600x1200 120Hz reduced blanking
- hdmi_mode=57 1680x1050 reduced blanking
- hdmi_mode=58 1680x1050 60Hz
- hdmi_mode=59 1680x1050 75Hz
- hdmi_mode=60 1680x1050 85Hz
- hdmi_mode=61 1680x1050 120Hz reduced blanking
- hdmi_mode=62 1792x1344 60Hz
- hdmi_mode=63 1792x1344 75Hz
- hdmi_mode=64 1792x1344 120Hz reduced blanking
- hdmi_mode=65 1856x1392 60Hz
- hdmi_mode=66 1856x1392 75Hz
- hdmi_mode=67 1856x1392 120Hz reduced blanking
- hdmi_mode=68 1920x1200 reduced blanking
- hdmi_mode=69 1920x1200 60Hz
- hdmi_mode=70 1920x1200 75Hz
- hdmi_mode=71 1920x1200 85Hz
- hdmi_mode=72 1920x1200 120Hz reduced blanking
- hdmi_mode=73 1920x1440 60Hz
- hdmi_mode=74 1920x1440 75Hz
- hdmi_mode=75 1920x1440 120Hz reduced blanking
- hdmi_mode=76 2560x1600 reduced blanking
- hdmi_mode=77 2560x1600 60Hz
- hdmi_mode=78 2560x1600 75Hz
- hdmi_mode=79 2560x1600 85Hz
- hdmi_mode=80 2560x1600 120Hz reduced blanking
- hdmi_mode=81 1366x768 60Hz
- hdmi_mode=82 1080p 60Hz
- hdmi_mode=83 1600x900 reduced blanking
- hdmi_mode=84 2048x1152 reduced blanking
- hdmi_mode=85 720p 60Hz
- hdmi_mode=86 1366x768 reduced blanking
- These values are valid if hdmi_group=2 (DMT)
- Remember reboot your system after modified /boot/config.txt file.
