Z-0017
7 Inches 1024*600 Raspberry Pi LCD Touch Screen
* Purchase URL [ https://52pi.com/products/7-inch-1024-600-tft-lcd-resistive-display-monitor-touch-screen-with-driver-board-hdmi-vga-2av ]
Description
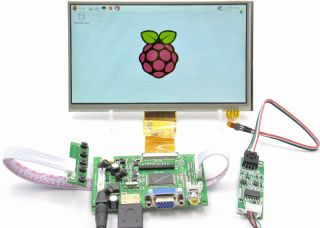
Can you imaging that you have a Raspberry Pi or banana Pi, or beagle bone development board, or you just want to make a portable media center. you can use this screen to create your own funny staff, such as making robot's face, making Ironman helmet and so on. you just need a good monitor screen to finish your design. the following one is your best choice.
Compatibility List
- Compatibility
| Platform | Screen and driver board | Notes |
|---|---|---|
| Raspberry Pi 4 Model B | √ | |
| Raspberry Pi 3 Model A Plus | √ | |
| Raspberry Pi 3 Model B Plus | √ | |
| Raspberry Pi 3 Model B | √ | |
| Raspberry Pi 2 Model B | √ | |
| windows 7/8/10 | √ | |
| Mac | √ |
Feature:
- Operating voltage: 5V (current requirement 2A), 9V@1.5A(Recommended) ,12V@1A ,
- Rated power: 6-7W
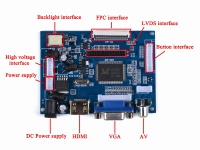
- Signal input: AV + VGA + HDMI (HDMI 1.2)
- Resolution: 1024 * 600,
- Plug and Play: Support
- OSD language: Simplified Chinese, Traditional Chinese, English, Japanese, Korean, Spanish, French, German, Italian, Portuguese
- Control: Multi-function OSD operation or potentiometer adjust the brightness and color
- Features: Using mature program, clear display
- Support image flip up and down, the image can conversion 4: 3 / 16: 9 display format
- Support 30fps.
LCD screen parameters:
- Display size: 7 inch
- Touch screen: Optional
- Dimensions: 165 (W) × 100 (H) × 5 (D) mm
- Viewing area: 154.08 (H) × 85.92 (V)
- Resolution: 1024 × 3 (RGB) ×600
- Point distance: 0.05 (W) × 0.15 (H) mm
- Viewing angle: L70 ° R70 ° U50 ° D60
- Panel type: TFT
- Display color: 262K
- Contrast ratio: 500: 1
- Brightness: 220cd / m2
- Interface type: Digital
- The number of connection: 50 PIN Digital (TTL) TCON
- Backlight: LED
- Applications: mobile DVD, digital photo frame, car systems, multimedia applications and other audiovisual systems
How to wire it up?
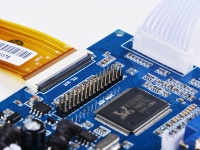
Note: Please pay attention to the FPC cable, make sure it was locked in position, tightly.
Note:
This controller board DOES NOT support Automatically Switch to AV2(Reversing View camera). Please connected ACC to 12V.
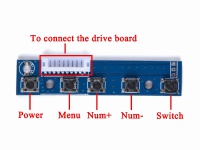
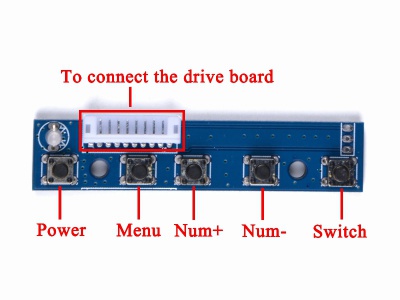
The five buttons are as follows: S1 = Power, S2=Menu/Select, S3=Up, S4=Down, S5=Video Source Select
Package Includes:
- 1xHDMI+VGA+2AV Controller Board
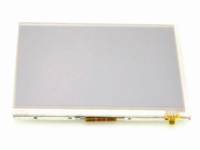
- 1x7inch 1024*600 Lcd Panel
- 1x5-button switch and adjustment panel
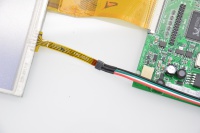
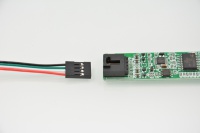
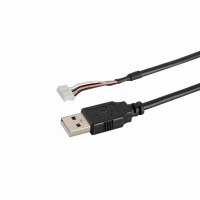
- 1x7 inch Touch Screen Kit
- 1xPower Cable
Documents
- How to setup resolution:
- Modify /boot/config.txt file with vim.tiny or nano editor, and change the parameters as following chart:
| Resolution | config file |
|---|---|
| 1024x600 | hdmi_force_hotplug=1 hdmi_group=2 |
Please reboot Raspberry Pi after modifying the /boot/config.txt
How to setup Resolution Automatically
There is a easy way to setup resolution of your screen by a shell script, you can download the scripts by git tool and use it to change resolution for your screens as following steps:
git clone https://github.com/geeekpi/lcd-config.git
cd ~/lcd-config
sudo chmod +x resolution_tool.sh
sudo bash resolution_tool.sh
and then follow the step to chose the screen type that you have, and it will automatically setup the resolution for you.
- How to calibrate touch screen:
Attention: Raspbian Image file must be newer than 2016-03-18, it contains touch screen's driver within the kernel, but the old version does not.
After imaging the TF card and reboot your raspberry Pi, please login system and open a terminal and typing following command to install the calibration software.
sudo apt-get update && sudo apt-get -y install xinput libx11-dev libxext-dev x11proto-input-dev evtest dh-autoreconf libts-bin libxi-dev
And then, you can calibrate as following step:
cd ~
git clone https://github.com/tias/xinput_calibrator
cd ~/xinput_calibrator
sudo ./autogen.sh
sudo make
sudo make install
Then typing this command to calibrate your touch screen:
DISPLAY=:0.0 xinput_calibrator
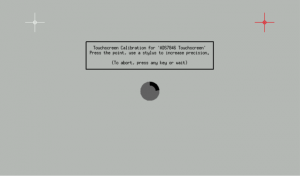
And press enter, you will find there is a calibration pannel on your touch screen like this:
You should point at the red cross on your touch screen within 60s to calibrate touch screen.
After that, you will see some output on your terminal, please write it into /etc/X11/xorg.conf.d/99-calibration.conf file by vim.tiny command:
this is an example:
Please pay attention to that red box with the picture.
- Generate the configuration file with 2 steps:
sudo mkdir -p /etc/X11/xorg.conf.d/
sudo vim.tiny /etc/X11/xorg.conf.d/99-calibration.conf
And press "i" means insert,and copy the parameters between "Section" to "EndSection" and paste into this file, it will be read by system when you reboot system.
Then press "ESC" and typing ":wq" to save and quit.
Reboot your Raspberry Pi after you've finished the steps that I wrote before.
have fun.
How to use script to calibrate touch screen
It is a easy way to calibrate touch screen by using script, so if you do not know much about the command line operation, you can follow the steps to calibrate your touch screen.
- 1. Press "ctrl+alt+T" to open a terminal and type this command:
cd /home/pi
git clone https://github.com/geeekpi/lcd-config.git
cd /home/pi/lcd-config/
sudo chmod +x calibration_tool.sh
sudo bash calibration_tool.sh
and follow the information to choose the type of your screen.
- 2 After rebooting, open a terminal and typing this command :
DISPLAY=:0.0 xinput_calibrator
Press the cross sign on the screen,it will calculate the position parameters and it will display on your screen.
DO REMEMBER to copy and paste it into a file under /etc/X11/xorg.conf.d/99-calibration.conf file and reboot your system.
Other Device Driver Download
Attention:
- If you use other operating system to connect this Display kit, such as:
        **» Windows
	**» Windows CE
	**» Linux
	**» Android
	**» Mac OS
	**» QNX
	**» Dos
You can download drivers from this web site: http://www.eeti.com.tw/drivers.html
Note:we do not offer technology support on other board except Raspberry Pi.
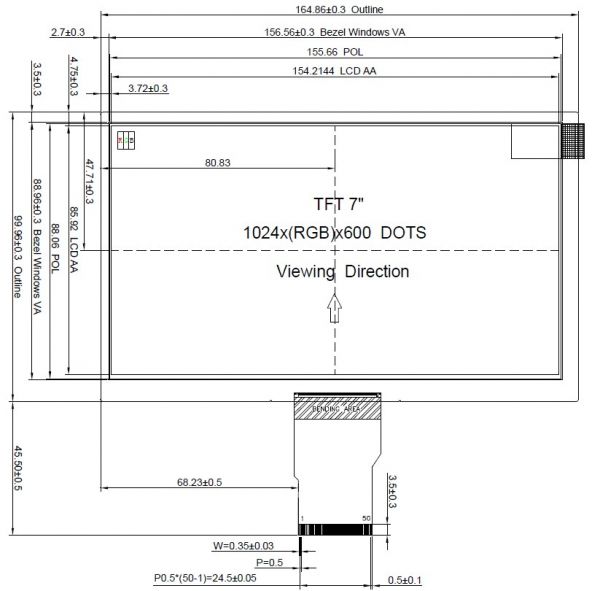
Screen Dimension
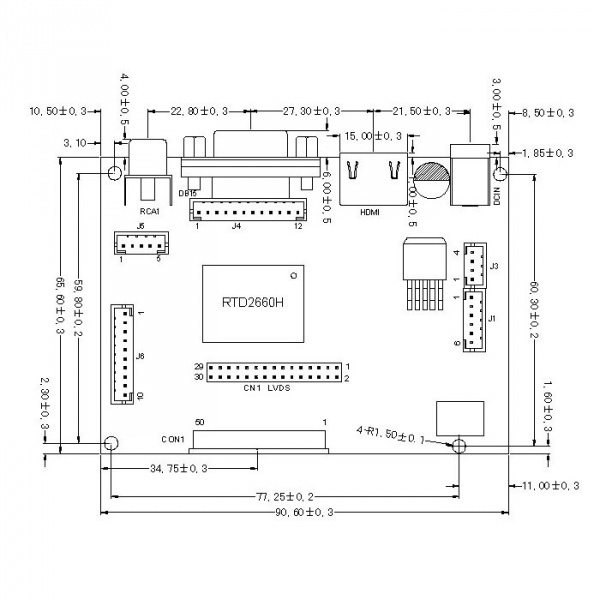
Video Driver Board Mechanical Drawing
FAQ
- Q: Does it have the function of multitouch and change the backlight?
A: No,neither of one.
