EP-0168: Difference between revisions
Jump to navigation
Jump to search
| Line 32: | Line 32: | ||
==How to assemble it== | ==How to assemble it== | ||
* Peel off the protection film from both side of acrylic panel. | * Peel off the protection film from both side of acrylic panel. | ||
* Fix copper pillar to acrylic panel with | * Fix copper pillar to acrylic panel with M2.5 screws. | ||
* Fix Raspberry Pi to acrylic panel with copper pillar and screws. | * Fix Raspberry Pi to acrylic panel with copper pillar and screws. | ||
* Connect LED screw terminal hat to GPIO Pins.(make sure the white dot facing 5V on GPIO Pin) | * Connect LED screw terminal hat to GPIO Pins.(make sure the white dot facing 5V on GPIO Pin) | ||
* Fix screw terminal hat with screws. | * Fix screw terminal hat with screws. | ||
* Unscrew the terminal and insert jump wire, and screw it tight. | * Unscrew the terminal and insert jump wire, and screw it tight. (make sure the copper wire is connect to screw terminal properly) | ||
<font color=red> The LED screw terminal hat does not have any protection circuit on the board, please double check the circuit that you build, wrong connection may damage your Pi, it is on your own risk.</font> | <font color=red> The LED screw terminal hat does not have any protection circuit on the board, please double check the circuit that you build, wrong connection may damage your Pi, it is on your own risk.</font> | ||
Revision as of 15:37, 10 April 2023
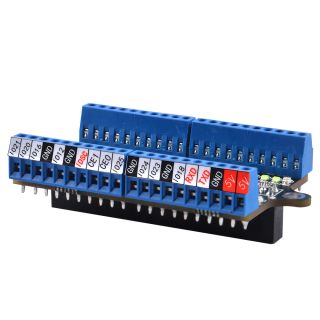
LED Screw Terminal Hat for Raspberry Pi

Descriptions
LED Screw Terminal Hat for Raspberry Pi is a GPIO expansion board which is for easy connecting to the 40-Pins GPIO of Raspberry Pi and it can be observing the Pin status via LED indicators, once the GPIO has level changed, the led indicator will be blinking.
Features
- Compatibility: Raspberry Pi 40Pin GPIO (Raspberry Pi 4B/3B/3B+/zero/zero w)
- Easy to assemble
- Screw terminal
- GPIO LED indicator
- Stable connection for wiring circuit
Gallery
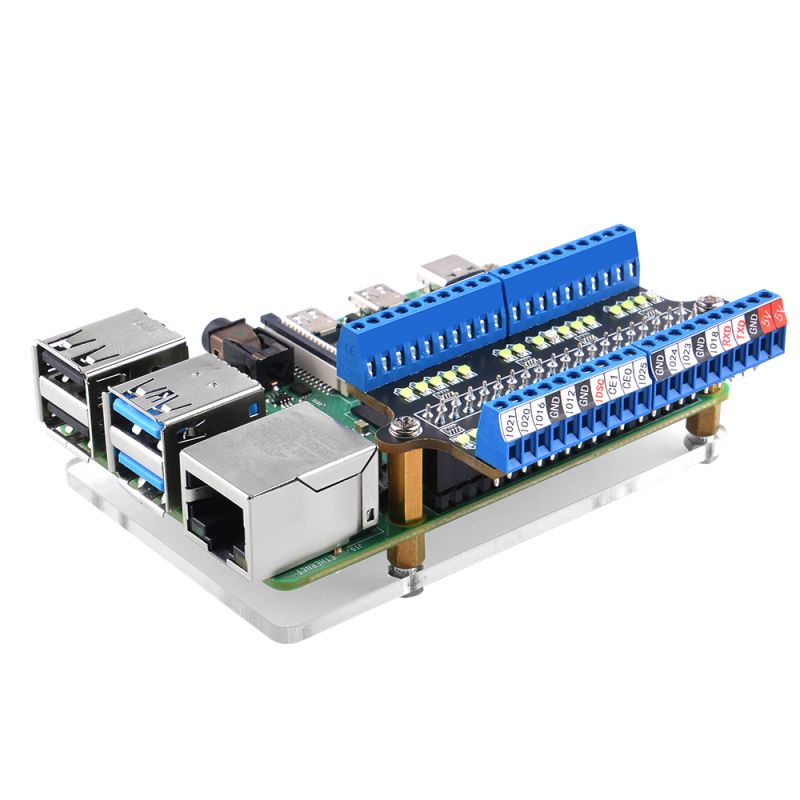
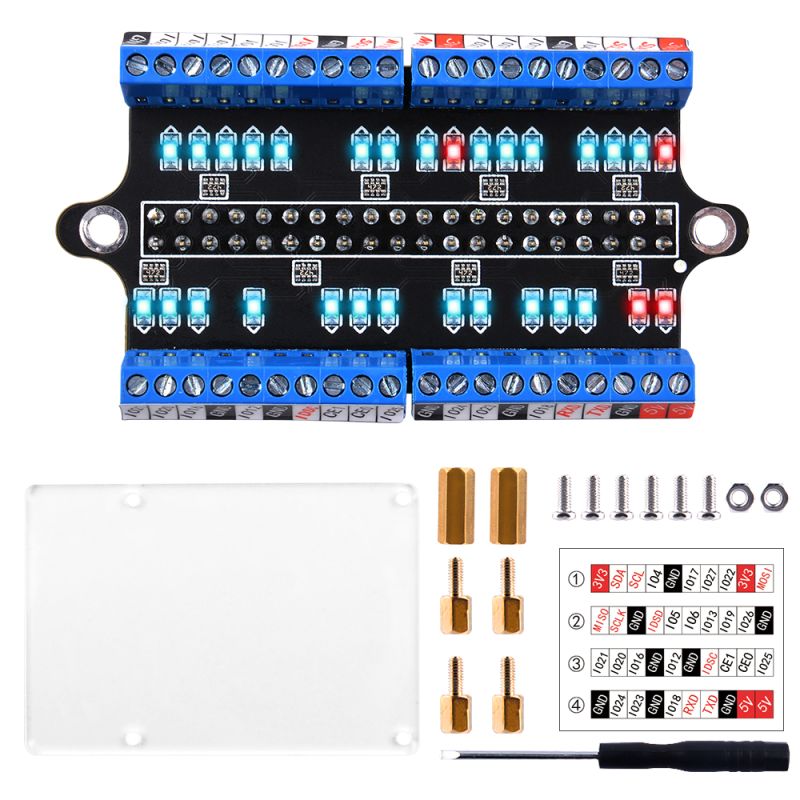
- Product Outlook
 |
 |
 |
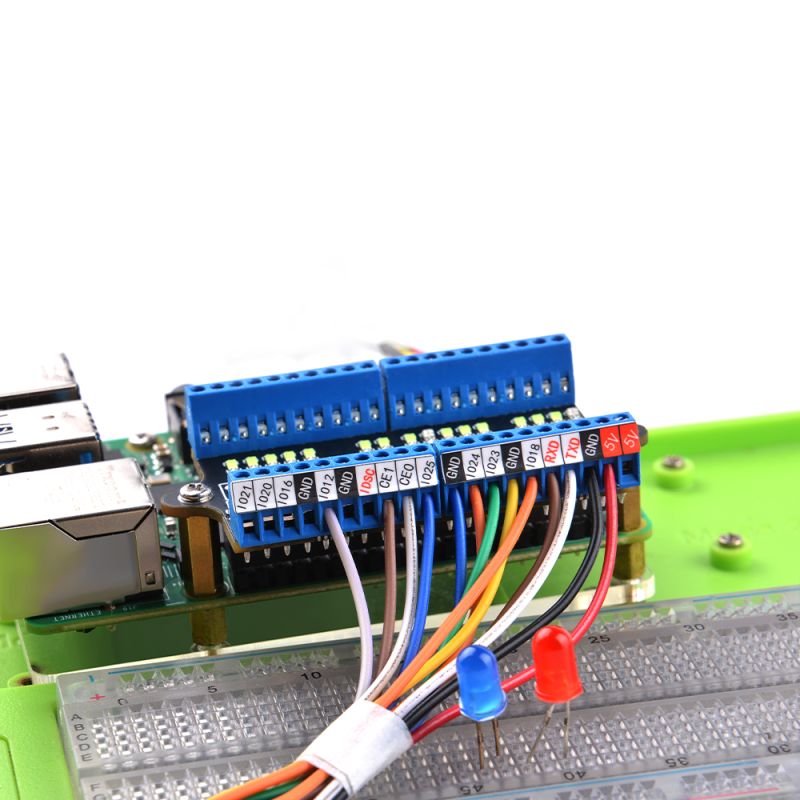
- Application scenario


- Assembled Status
 |
 |
 |
Note: Please make sure the white dot is against to GPIO Pin 2 (Physical Number 2,which is 5V), wrong direction may damage your Pi!!!
How to assemble it
- Peel off the protection film from both side of acrylic panel.
- Fix copper pillar to acrylic panel with M2.5 screws.
- Fix Raspberry Pi to acrylic panel with copper pillar and screws.
- Connect LED screw terminal hat to GPIO Pins.(make sure the white dot facing 5V on GPIO Pin)
- Fix screw terminal hat with screws.
- Unscrew the terminal and insert jump wire, and screw it tight. (make sure the copper wire is connect to screw terminal properly)
The LED screw terminal hat does not have any protection circuit on the board, please double check the circuit that you build, wrong connection may damage your Pi, it is on your own risk.
Package Includes
- 1 x LED screw terminal hat pack

Keywords
- LED Screw Terminal Hat for Raspberry Pi, Screw terminal hat, 40pin screw terminal hat